LAPTOP • DAILYTECH.ID - To delete bookmarks on a Chromebook, open Chrome, click the three-dot menu, navigate to ‘Bookmarks,’ then ‘Bookmark Manager.’ Right-click (or two-finger tap) the unwanted bookmark or folder and select ‘Delete.’ For multiple bookmarks, use Ctrl+click to select them before deleting. To remove the entire Bookmarks Bar, hide it via Chrome settings or a keyboard shortcut.
Deleting bookmarks on your Chromebook is a straightforward process that helps declutter your browser and improve organization. Understanding these methods ensures a clean and efficient browsing experience on your device.
Navigating the Bookmark Manager on Your Chromebook
Within the vast digital landscape we journey through each day, our Chromebooks serve as trusted companions, helping us collect knowledge and map our pathways. Much like a seasoned scout keeps a careful record of trails and significant places, the Chrome Bookmark Manager is your central lodge for all the digital wisdom you’ve gathered. It is here, within this manager, that you hold the power to organize, edit, and, when the time comes, let go of the saved web pages that no longer serve your journey. Accessing this heart of your digital library is the very first step toward bringing clarity and order to your browser’s collection, ensuring that your digital path remains clear and true. Learning how to navigate this space empowers you to take full control, making it simple to remove bookmarks from your Chromebook that no longer align with your current needs or interests. Think of it as tending to your personal collection of important scrolls, deciding which ones to keep and which to return to the winds of the internet.
To begin this journey into the Bookmark Manager, follow these simple steps, and soon you will be walking with purpose through your saved links:
- Open your Chrome browser: Just as you step onto a familiar trail, launch the Chrome browser on your Chromebook.
- Seek the Three-Dot Menu: In the upper right corner of your browser window, you will see three vertically stacked dots. This is often called the “More” menu or the “Kebab” menu. Click on it gently, as you would signal a friend from afar.
- Journey to “Bookmarks”: From the dropdown path that appears, guide your cursor to the “Bookmarks” option. Hover over it, and another path will unfold.
- Enter the “Bookmark Manager”: Within this new path, click on “Bookmark Manager.” This is the gateway to where all your saved journeys reside.
Once inside, you will find a clear view of all your bookmarked pages and folders, laid out for you to tend. Here, the power to delete bookmarks Chromebook-style truly begins, offering a comprehensive way to tidy your digital space.
How to Delete a Single Bookmark
Sometimes, just one path needs to be cleared, one memory released from your collection. Removing individual bookmarks is like plucking a single dry leaf from a vibrant plant – it helps maintain the health and beauty of the whole without disturbing the rest. This precise method ensures that you only target the specific, unwanted entries, leaving all others untouched, preserving the valuable parts of your digital map. It’s a mindful act of decluttering, ensuring every saved link holds its purpose or is respectfully released. This process is crucial when you simply need to remove bookmarks on a Chromebook that are no longer relevant, such as a temporary research link or a page that has moved.
To remove a single bookmark with care:
- Navigate to the Bookmark Manager: If you are not already there, follow the path outlined above to open your Bookmark Manager.
- Locate Your Target: Look through your list of bookmarks, perhaps with the patience of an eagle scouting its domain, until you find the one you wish to release.
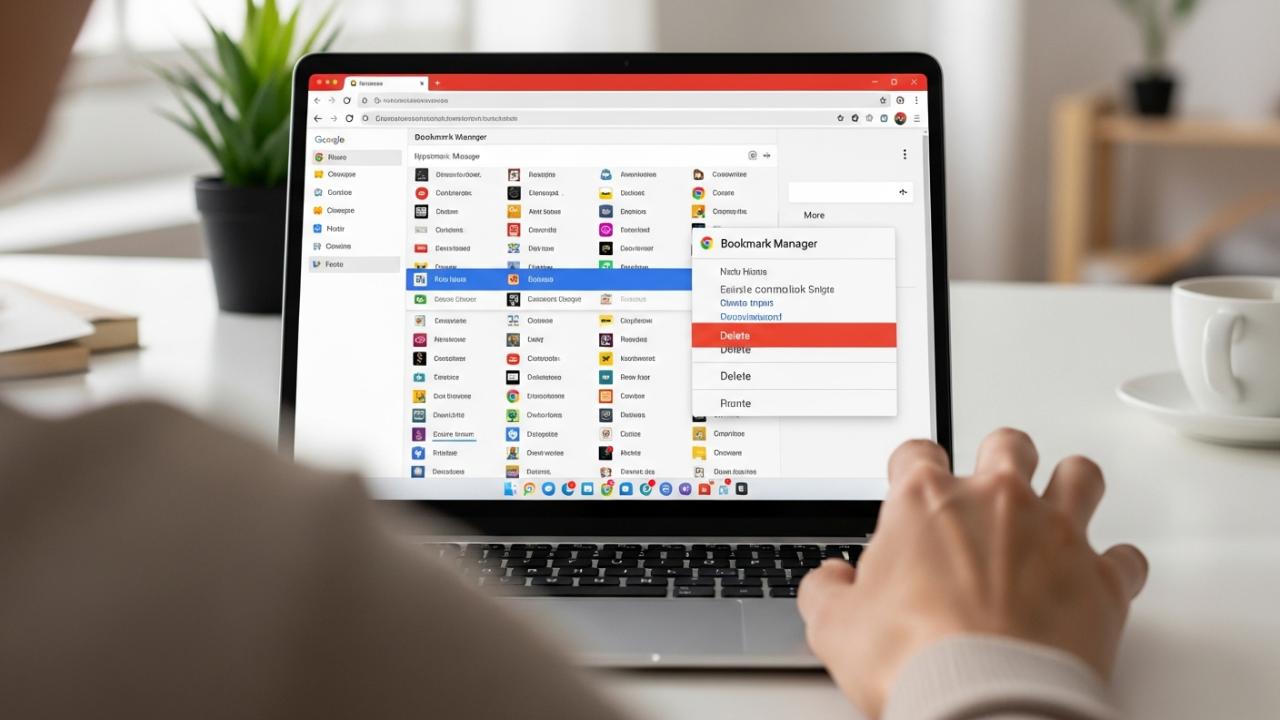
- Summon the Context Menu: With your cursor, hover over the chosen bookmark. Then, perform a right-click. On a Chromebook, this is often achieved by tapping with two fingers on your trackpad, or by holding down the
Altkey and clicking with one finger. If you have an external mouse, a simple right-click will do. - Choose “Delete”: A small menu will appear, offering several options. Among them, you will see “Delete.” Click on this option.
Immediately, like a wisp of smoke, the bookmark will vanish from your collection. There is no confirmation prompt for single bookmark deletions, so choose with a clear heart. This is the most direct way to delete bookmarks from Chromebook one by one.
How to Delete Multiple Bookmarks at Once
There are times when many paths have grown overgrown, or an entire section of your digital map no longer serves your journey. When you find yourself with several irrelevant bookmarks, perhaps from a past project or a season of swift exploration, deleting them in a collective action saves significant time and energy. It’s like sweeping many fallen leaves from the communal lodge floor at once, rather than one by one. Learning these efficient ways to select and remove multiple entries quickly is a valuable skill for any Chromebook user looking to maintain a tidy and purposeful digital space. This method is particularly useful when you need to mass delete bookmarks on Chromebook, clearing out large sections of saved links without the tedium of individual removal.
Selecting Multiple Bookmarks with Mouse and Keyboard
Gathering multiple bookmarks for deletion requires a slightly different approach, akin to gathering several herbs for a healing potion.
- Enter the Bookmark Manager: Ensure you are within the Bookmark Manager window.
- Begin Your Selection:
- For Adjacent Bookmarks: If the bookmarks you wish to delete are next to each other in the list, click on the first one to select it. Then, hold down the
Shiftkey on your keyboard and click on the last bookmark in the contiguous group. All bookmarks between your first and last click will become highlighted, marking them for collective action. - For Non-Adjacent Bookmarks: If your chosen bookmarks are scattered throughout the list, hold down the
Ctrlkey (orCmdkey if you are accustomed to other systems) on your keyboard. While holdingCtrl, click on each individual bookmark you wish to select. Each click will add or remove that bookmark from your selection without affecting others.
Take your time as you select, ensuring that only the unwanted ones are highlighted. This method provides flexibility whether you need to delete multiple bookmarks at once on Chromebook that are grouped or spread out.
- For Adjacent Bookmarks: If the bookmarks you wish to delete are next to each other in the list, click on the first one to select it. Then, hold down the
Efficiently Deleting Selected Bookmarks
Once your selected bookmarks stand together, marked for removal:
- Summon the Collective Menu: With all your chosen bookmarks highlighted, perform a right-click on any one of the selected bookmarks. Remember, a two-finger tap on the trackpad or
Alt+click will work for Chromebook users without an external mouse. - Choose “Delete”: As before, a context menu will appear. Select the “Delete” option.
With a single, decisive action, all the highlighted bookmarks will disappear, like a flock of birds taking to the sky. This powerful method allows you to quickly delete all your bookmarks at once on Chromebook if you select everything, or manage specific groups with ease, making the task of how to delete multiple bookmarks on chromebook incredibly efficient.
How to Delete All Bookmarks on Your Chromebook
There are moments in life when a complete reset feels necessary, a chance to begin anew with a fresh perspective. Perhaps you are handing down your Chromebook, or perhaps your digital library has simply become too vast and tangled to sort through individually. For such a complete overhaul or a truly fresh start, deleting all bookmarks clears your entire saved list, allowing you to build your digital pathways from the ground up once more. This is often the fastest way to reset your bookmark collection, offering a clean slate for future explorations. Before you take this significant step, understand that this action is like clearing an entire field; once done, the previous plantings are gone. There is no “undo” button for this total removal.
To embark on this grand clearing:
- Access the Bookmark Manager: Begin your journey by opening the Bookmark Manager, as described earlier in our guidance.
- Initiate Selection: Within the Bookmark Manager, you must first select all the bookmarks.
- One way is to click on any single bookmark to highlight it. Then, hold down the
Ctrlkey (orCmd) and press theAkey (Ctrl+AorCmd+A). This universal command acts like a wide net, selecting every single bookmark and folder within the manager. Every item will become highlighted, signifying its readiness for removal.
- One way is to click on any single bookmark to highlight it. Then, hold down the
- Summon the Context Menu: With all items highlighted, perform a right-click on any one of the selected bookmarks or folders. Remember the two-finger tap on your Chromebook’s trackpad if you are without an external mouse.
- Execute the “Delete” Command: From the menu that appears, choose “Delete.”
Just like a great wind sweeping through the digital plains, all your bookmarks will vanish. This method is the ultimate answer for those asking how to delete all bookmarks on a Chromebook or how to delete all your bookmarks at once on Chromebook, providing a quick and comprehensive solution. Be certain of your choice before proceeding, for this act of clearing is final.
Managing Bookmark Folders
As our digital journeys lengthen, we often find the need to group our insights and discoveries into meaningful bundles. Bookmarks are frequently organized into folders, much like a seasoned traveler might bundle similar herbs or tools together for better navigation and ease of access. Understanding how to manage these folders, including the process of their deletion, is crucial for maintaining an organized and intuitive browser experience. These folders serve as little digital containers, keeping related links in harmony, preventing a sprawling mess and allowing for quick retrieval of specific information. Just as a well-kept garden has designated areas for different plants, organized bookmark folders bring structure to your online world.
Deleting a Bookmark Folder
Sometimes, an entire bundle of related paths or a whole season of collected wisdom might no longer be needed. Removing an entire folder streamlines your bookmark collection, much like consolidating an old camp that no longer serves your journey. This action efficiently gets rid of a group of related, unwanted links, clearing a larger space in your digital environment. However, it is vital to proceed with a clear understanding: deleting a folder is a powerful action, and it will also delete every single bookmark nestled within that folder. Consider it like dismantling a camp – everything inside goes with it.
To carefully delete a bookmark folder:
- Open the Bookmark Manager: Access your Bookmark Manager as if stepping into your main storage lodge.
- Locate the Folder: With a keen eye, find the specific folder you intend to remove. Take a moment to glance over its contents if you have any doubt, ensuring you are ready to let go of everything it holds.
- Summon the Context Menu: Hover your cursor over the folder’s name. Then, perform a right-click (two-finger tap on the trackpad for Chromebook users).
- Select “Delete”: From the choices that unfold, click on the “Delete” option.
Unlike single bookmarks, Chrome will often provide a small prompt, a gentle query to confirm if you truly wish to delete the folder and all its contents. Read this message carefully and click “Delete” again if your decision stands firm. This step is essential when you need to know how to delete bookmark folders on Chromebook, ensuring you manage your organized clusters effectively.
Removing the Bookmarks Bar from Your Chromebook
The Bookmarks Bar, often stretched across the top of your Chrome browser, can be a trusty friend, offering quick access to your most frequently visited sites. It’s like having your most useful tools hanging within easy reach in your lodge. However, some users, perhaps those who cherish a more expansive view of the digital horizon, might prefer a cleaner, more minimalist interface. For them, reclaiming that screen space can enhance the browsing experience. Thankfully, you have flexible options to manage this bar, whether you wish to temporarily hide it like a cloud passing before the sun, or permanently tuck it away from view. This allows you to tailor your Chromebook’s interface to your personal preference, much like arranging your living space for optimal comfort.
Temporarily Hiding the Bookmarks Bar
Sometimes, the need for a wider view is fleeting, like needing an unobstructed gaze at the sunrise. This option allows you to reclaim screen space without actually deleting any of your cherished bookmarks. The Bookmarks Bar can be toggled on and off as needed, making it a flexible tool that serves you when required and steps aside when you prefer more visual freedom. It’s perfect for presentations, watching videos, or simply enjoying a clean browser window, knowing your bookmarks are just a quick command away, not truly gone. This is a great way to remove bookmarks bar on Chromebook for a moment without losing anything.
To temporarily hide or show the Bookmarks Bar:
- Keyboard Shortcut: The quickest path is to use a simple keyboard command. Press
Ctrl + Shift + Bsimultaneously.- Pressing these keys once will cause the Bookmarks Bar to disappear, like mist lifting from the forest floor.
- Pressing them again will bring the bar back into view, restoring your quick access links.
- Through the Three-Dot Menu: You can also manage this through the browser’s menu.
- Click the three-dot “More” menu in the upper right corner of Chrome.
- Navigate your cursor to “Bookmarks.”
- In the submenu that appears, you will see an option labeled “Show bookmarks bar.” If it has a checkmark next to it, clicking it will hide the bar. If it does not have a checkmark, clicking it will show the bar.
This method allows you to remove bookmarks from chrome toolbar on Chromebook without permanent changes.
Permanently Disabling the Bookmarks Bar
For those who truly prefer a perpetually clean and expansive horizon, free from the presence of the Bookmarks Bar, there is a way to disable it through Chrome settings. This option is for users who embrace a minimalist browsing window as their default state, ensuring that the bar does not appear even upon new tab openings. It’s a deeper setting, ensuring the bar remains tucked away until you explicitly decide to bring it back. This is akin to permanently clearing a path that you rarely use, choosing simplicity for the everyday journey. This provides a solution for those who wonder how to remove the favorites bar chrome on Chromebook.
To permanently disable the Bookmarks Bar:
- Access Chrome Settings:
- Click the three-dot “More” menu in the upper right of your Chrome browser.
- From the dropdown list, choose “Settings.” This will open a new tab dedicated to Chrome’s deeper configurations.
- Navigate to “Appearance”: In the left-hand panel of the Settings page, look for the “Appearance” section. Click on it.
- Toggle the Bookmarks Bar: Within the “Appearance” settings, you will find an option labeled “Show bookmarks bar.” This will be a toggle switch.
- Click this toggle to switch it to the “Off” position.
Once you do this, the Bookmarks Bar will vanish from all your Chrome windows and new tabs, offering that clean, wide-open browsing experience you desire. Should you ever wish to bring it back, simply return to this setting and toggle it “On” again. This is how to delete bookmark bar from chrome on Chromebook, giving you lasting control over your browser’s aesthetic.
- Click this toggle to switch it to the “Off” position.
Deleting Bookmarks Without a Mouse on Chromebook
Chromebooks are truly versatile tools, designed to adapt to many hands and many ways of working. Sometimes, a seasoned traveler might find themselves without their familiar mouse, relying solely on the intuitive touch of their trackpad or the steady rhythm of their keyboard. This section is dedicated to those times, covering methods for bookmark deletion when you need to navigate and clear your digital paths using only the built-in trackpad gestures or the precise commands of keyboard shortcuts. It’s about learning to walk a different, yet equally effective, path. Knowing how to delete bookmarks on chromebook without mouse enhances your adaptability.
Using Touchpad Gestures for Deletion
The Chromebook trackpad is more than just a pointing device; it understands the language of touch.
- Access the Bookmark Manager: First, bring forth your Bookmark Manager, as it is the central gathering place for all your links.
- Locate and Select: Use one finger to navigate your cursor to the bookmark or folder you wish to delete. Click once to select it.
- Perform a Right-Click Gesture: To conjure the context menu (the options menu), instead of a physical right-click button, you will use a two-finger tap on your trackpad. Position two fingers lightly on the trackpad and tap firmly. This gesture is your digital right-click.
- Choose “Delete”: Once the context menu appears, use your single finger to navigate the cursor down to the “Delete” option, and then tap once to select it.
This simple two-finger tap is the key to many actions on your Chromebook, making it easy to remove bookmarks from Chromebook even when a mouse is not present.
Keyboard Shortcuts for Bookmark Management
For those whose fingers dance across the keyboard with a natural rhythm, knowing the shortcuts can feel like a secret language, unlocking swift actions.
- Open Bookmark Manager: Start by opening the Bookmark Manager. You can use the shortcut
Ctrl + Shift + Oto open it directly. - Navigate with Keyboard: Once inside the Bookmark Manager:
- Use the
Tabkey to move focus between different panels (search bar, main bookmark list). - Once you are in the main list of bookmarks, use the
UpandDownarrow keys to move through the individual bookmarks and folders. As you highlight an item, it will become selected.
- Use the
- Select Multiple (if needed):
- To select adjacent items, hold
Shiftand use theUporDownarrow keys. - To select non-adjacent items, this method is trickier without a mouse. You may need to rely on selecting one at a time or using
Ctrl + Ato select all if that’s your intention.
- To select adjacent items, hold
- Summon the Context Menu (Keyboard Method): With a bookmark or folder highlighted, press
Shift + F10. This key combination often functions as a right-click or context menu opener in many applications, including Chrome. IfShift + F10doesn’t work on your specific Chromebook, some models might use a dedicated context menu key, orAlt + Entermight sometimes bring up relevant options, thoughShift + F10is generally reliable for the context menu. - Choose “Delete”: Once the context menu appears, use the
UporDownarrow keys to navigate to the “Delete” option. Then, press theEnterkey to confirm your choice.
By mastering these keyboard shortcuts and touchpad gestures, you gain full command over how to delete bookmarks on Chromebook without a mouse, ensuring your digital pathways remain clear, no matter how you choose to journey.
Addressing Specific Bookmark Scenarios
Our digital lives are diverse, and so are the situations in which we manage our treasured links. Like different lands with their own customs, various scenarios might require specific approaches to bookmark deletion. From devices managed by a school to the ever-present challenge of synced content across multiple devices, understanding these nuances ensures you can effectively manage your digital keepsakes no matter the circumstance.
Deleting Bookmarks on a School Chromebook
A school-issued Chromebook is often a shared vessel, a tool provided for learning, and as such, it comes with certain guidelines, much like the rules of a shared communal space. These devices are typically managed by the school’s IT administration, meaning they often have restrictions on what users can and cannot alter, including bookmark management. The power of the administrators is significant, and they may have set policies that prevent you from deleting bookmarks, or even saving new ones, especially on a school chromebook. It’s like respecting the elder’s rules of the digital village; their choices are for the good of all within the shared network.
If you find yourself needing to delete bookmarks on a school Chromebook:
- Try the Standard Methods: First, attempt the standard deletion methods outlined earlier. Sometimes, schools allow basic bookmark management.
- Check for Profile Restrictions: You might be operating under a specific user profile that has limited permissions.
- Consult with IT or Teacher: If the standard methods do not work, the most respectful and effective path is to reach out to your school’s IT support or your teacher. They are the keepers of the device’s policies and can guide you on what is permissible or even perform the deletion for you if it aligns with school policy. They might explain how to delete bookmarks on school chromebook under their guidance.
Remember, these restrictions are usually in place to ensure a safe and productive learning environment for all students.
Handling Synced or Duplicate Bookmarks
In our interconnected world, our digital footprint often stretches across many devices, like shared wisdom spreading across many lands. Chrome’s synchronization feature, while incredibly useful for keeping your bookmarks consistent across your phone, tablet, and Chromebook, can sometimes lead to an unexpected bounty: duplicate bookmarks or persistent links that seem to reappear even after deletion. This happens when Chrome tries to merge bookmark lists from various sources, sometimes resulting in redundancy. It’s like gathering the same story from different tellers, only to find the essence is identical. Learning how to manage and prevent these issues is crucial for maintaining a truly tidy digital library, making sure your collection is streamlined and clear. This is particularly important for anyone asking how to delete duplicate chrome bookmarks on Chromebook or how to delete synced bookmarks chrome on Chromebook.
To address synced or duplicate bookmarks:
- Turn Off Sync Temporarily (for major cleanup): For a thorough clearing of duplicates or persistent unwanted bookmarks, consider pausing Chrome’s synchronization feature.
- On your Chromebook, open Chrome, click the three-dot menu, go to “Settings.”
- In the “You and Google” section, click on “Sync and Google services.”
- Click on “Manage what you sync.” Here, you can toggle off “Bookmarks.”
- Clean Up: Once sync is off on all your devices (or at least your primary one), return to your Bookmark Manager on your Chromebook. Now, perform a comprehensive cleanup, deleting all duplicates and any bookmarks that have stubbornly reappeared.
- Re-enable Sync Carefully: After cleaning, re-enable bookmark sync. Chrome should now upload your newly cleaned list, rather than re-downloading the old, cluttered one. If you have many duplicates, there are third-party Chrome extensions designed specifically to find and remove them, acting like a skilled hunter who removes excess from the trail.
This methodical approach helps prevent the reappearance of unwanted entries and ensures that your bookmark collection remains a true reflection of your current needs.
Deleting Bookmarks by Chromebook Brand (Acer, Dell, HP, Samsung, Google)
Just as the same sun shines upon different lands and warms various peoples, the method for deleting bookmarks remains wonderfully consistent across all different Chromebook brands. Whether your faithful companion is an Acer Chromebook, a sturdy Dell Chromebook, a swift HP Chromebook, an elegant Samsung Chromebook, or a pure Google Chromebook, the core functionality resides within the Chrome browser itself, not the device’s specific make. This means that every step and every instruction outlined in this guidance applies universally. The “how to delete bookmarks on chromebook” journey is the same for all, regardless of the emblem on the device’s casing. The Chrome browser acts as the universal guide, its pathways identical no matter which brand of digital vessel carries it. So, whether you are seeking how to delete bookmarks on acer chromebook or looking to delete bookmarks on dell chromebook, the wisdom shared here holds true.
FAQs – How to Delete Bookmarks on Chromebook
To quickly delete all bookmarks, open the Bookmark Manager (Ctrl + Shift + O), then press Ctrl + A to select all bookmarks and folders. Right-click (two-finger tap) on any selected item and choose “Delete.” Confirm if prompted. This action is irreversible.
It depends on the school’s IT policies. Many school-managed Chromebooks restrict user ability to delete or manage bookmarks. You can try the standard methods, but if they don’t work, contact your school’s IT support or teacher for assistance.
The easiest way is to use the Bookmark Manager. Hold Ctrl and click on individual bookmarks to select non-adjacent ones, or hold Shift and click to select a range of adjacent bookmarks. Then, right-click any selected bookmark and choose “Delete.”
To remove the Bookmarks Bar, you have two options: temporarily hide it by pressing Ctrl + Shift + B, or permanently disable it by going to Chrome “Settings,” then “Appearance,” and toggling off “Show bookmarks bar.”
Access the Bookmark Manager using Ctrl + Shift + O. Use Up/Down arrow keys to navigate to the bookmark, then perform a two-finger tap on the trackpad for a right-click. From the menu, select “Delete” using the arrow keys and Enter.