LAPTOP • DAILYTECH.ID - Deleting screenshots on a Chromebook is a straightforward process that helps manage storage and organize your files. Knowing the various methods for removal ensures you can efficiently clear unwanted captures from your device.
To delete screenshots on a Chromebook, open the Files app, navigate to ‘My files’ > ‘Downloads’ (or ‘Images’), locate the screenshot(s) you wish to remove, select them, and click the trash can icon. Confirm the deletion. For school Chromebooks, administrative restrictions may apply, so check with your IT department. This guide will walk you through each method, from single deletions to managing multiple and even all your captured images.
Locating Your Screenshots on a Chromebook
Before you can undertake the journey of how to delete screenshots on chromebook, it is essential to first understand where these digital captures reside within your device. Your Chromebook, a helpful companion in your daily tasks, has a designated place for all its captured moments. Typically, when you take a screenshot, whether it’s a full screen capture or a partial selection, the system automatically saves it to the “Downloads” folder. This folder acts as a primary repository for much of the content you generate or acquire on your Chromebook.
To begin this process, you must first access the heart of your file management: the Files app. Think of it as your digital strongbox, where all your important documents, images, and other media are neatly organized. You can easily find the Files app by clicking on the Launcher icon, which is usually a small circle located in the bottom-left corner of your screen. From there, a simple selection of “Files” will open the gateway to your stored content.
Once inside the Files app, you will observe a sidebar on the left. Here, look for “My files.” This category represents the local storage directly on your Chromebook. Within “My files,” you will almost certainly find the “Downloads” folder. This is the default and most common home for all your screenshots. Every time you capture a moment on your screen, it will bear a name like “Screenshot” followed by the exact date and time it was taken, making them easy to identify. For instance, you might see “Screenshot 2026-02-24 at 10.30.00 AM.”
In some configurations, or if you’ve moved them yourself, you might also find your screenshots nestled within an “Images” folder, also located under “My files.” It is a good practice to check both locations if you are having trouble locating a specific capture. Understanding these common storage paths is the critical first step in managing your visual records and moving forward to delete your screenshots on chromebook effectively. This knowledge empowers you to take control of your digital space and prepare for efficient file cleanup.
How to Delete a Single Screenshot on Your Chromebook
Sometimes, amidst a flurry of activity, you might capture a screenshot that is no longer needed, or perhaps it was taken by accident. When you just need to clear away one or two specific images, knowing how to delete a single screenshot on your Chromebook is the most precise and efficient method. This approach allows for careful curation of your visual records without disturbing the rest of your collected images. It’s a simple, direct path to tidying up your digital workspace.
Step-by-Step Guide to Delete One Screenshot
To walk this path, follow these clear steps:
- Open the Files app: Your journey begins by opening the main gateway to your stored content. Click on the Launcher icon (the circular button often found in the bottom-left corner of your screen), which will reveal your applications. From this selection, locate and click on the “Files” icon. This action opens the window where you can manage all your documents and images.
- Navigate to “My files”: Once the Files app is open, direct your gaze to the left sidebar of the window. Here, you will see various categories. Select “My files”. This section represents the local storage of your Chromebook, where your captured screenshots are typically kept. It’s the central hub for your device’s direct storage.
- Click on the “Downloads” folder: Within “My files,” locate and click on the “Downloads” folder. As we’ve discussed, this is the default and most common destination for nearly all screenshots taken on your Chromebook. If, for any reason, you do not find your specific screenshot here, take a moment to also check the “Images” folder within “My files,” as some systems or user preferences might direct captures there.
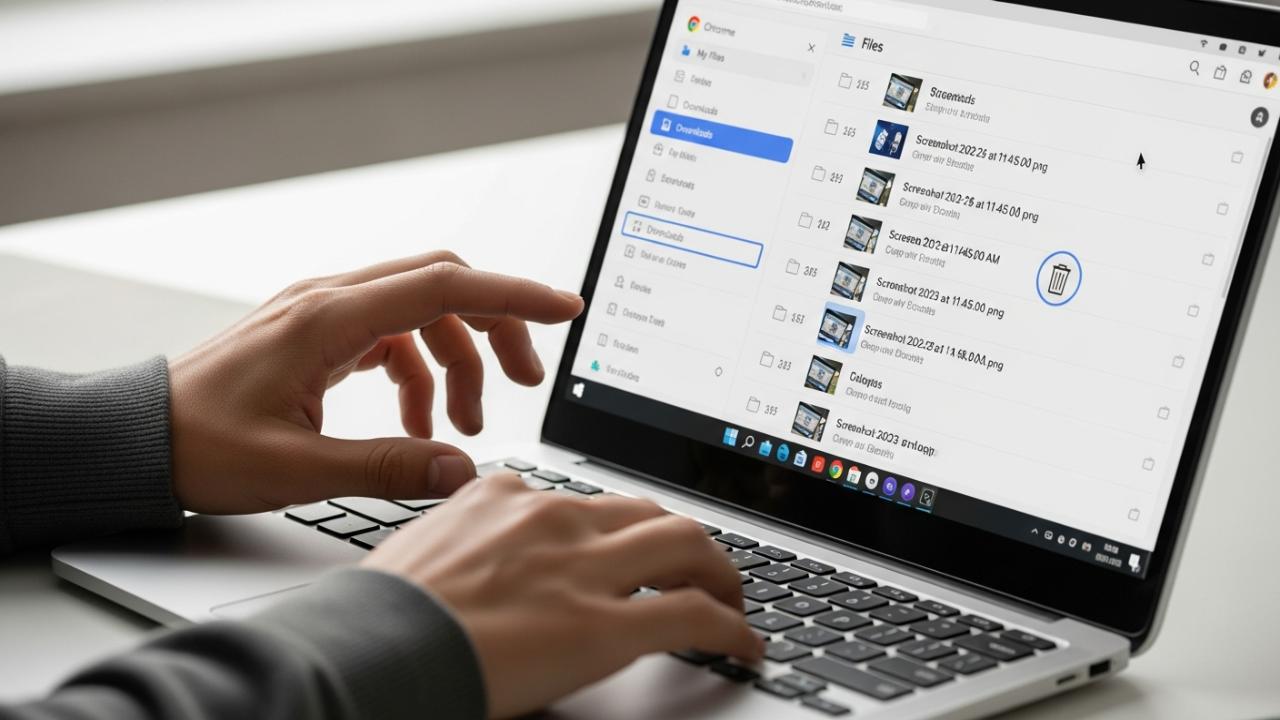
- Locate the screenshot: Now, in the “Downloads” (or “Images”) folder, you will see a list of files. Take your time to scroll through and visually identify the specific screenshot you wish to remove. Remember, screenshots are usually named in a sequential and date-stamped manner, making them fairly easy to spot. For instance, you might be looking for “Screenshot 2026-02-23 at 09.15.22 AM.png.”
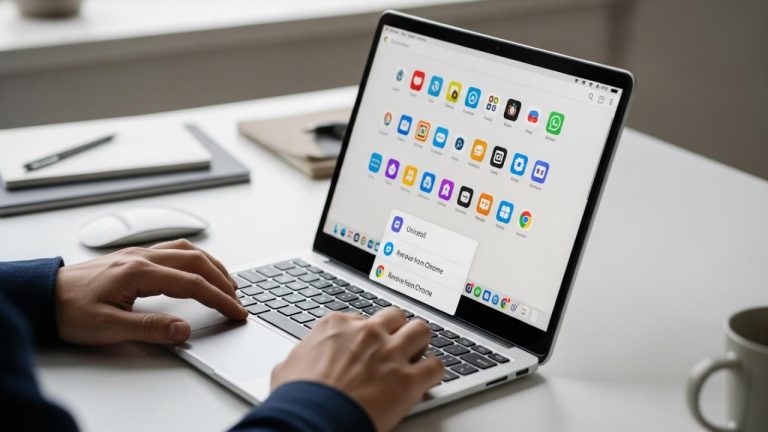
- Right-click on the screenshot: Once you have found the unwanted capture, move your cursor over it. To select it for deletion, right-click on the file. If you are using your Chromebook’s trackpad, this action is typically performed by tapping the trackpad with two fingers simultaneously. This will open a context menu, offering several options related to the file.
- Select “Delete” from the context menu: From the list of options that appears after you right-click, choose “Delete”. This command signals your intent to remove the selected file from its current location.
- Confirm the deletion: After selecting “Delete,” your Chromebook will present a small prompt asking you to confirm your decision. This is a crucial moment, acting as a safeguard to prevent accidental deletions. Click “Delete” again or confirm the action as prompted. Once confirmed, the screenshot will not be permanently erased immediately but will be moved to the “Trash” folder. This gives you a chance to recover it later if you change your mind, until the Trash is emptied.
By following these precise steps, you effectively learn how to delete your screenshots on chromebook one by one, maintaining a clean and purposeful collection of your captured moments.
How to Delete Multiple Screenshots on a Chromebook
As your digital journey progresses, you may find yourself with a multitude of screenshots that are no longer serving a purpose. Perhaps you captured a series of images for a project that is now complete, or you’ve accumulated many quick captures over time. When faced with this collection, deleting them one by one can feel like a lengthy task. Fortunately, Chromebooks offer an efficient pathway for those seeking how to delete multiple pictures on chromebook, allowing you to clear several unwanted captures in a single, swift action. This method is a great time-saver and helps you manage your digital clutter with ease.
Selecting and Deleting Several Screenshots
To perform this bulk deletion, simply follow these steps, building upon the knowledge you’ve gained for locating your files:
- Open the Files app: Just as before, your initial step is to access the central hub for your files. Click on the Launcher icon and then select the “Files” application. This opens the window where all your stored images and documents are visible.
- Go to “My files” > “Downloads” (or “Images”): Navigate through the left sidebar to “My files” and then proceed to the “Downloads” folder. As the primary home for your screenshots, this is where you will find the majority of your captured images. Remember to check the “Images” folder as well if your files are organized differently or if you moved them previously. This ensures you are viewing all the potential candidates for deletion.
- To select multiple screenshots, hold down the “Ctrl” key (or “Alt” key) and click on each screenshot you wish to delete: This is the key step for selecting multiple files. With your cursor, click on the first screenshot you want to remove. Then, hold down the “Ctrl” key on your keyboard. While holding “Ctrl,” continue to click on every additional screenshot you intend to delete. As you click, each selected file will become highlighted, usually with a distinct color or border, indicating that it is part of your selection. If the “Ctrl” key does not work as expected, try using the “Alt” key instead, as some Chromebook configurations might differ. This method allows you to hand-pick specific files, even if they are not arranged consecutively in the folder. This also applies to how to delete multiple pictures on chromebook beyond just screenshots.
- Once all desired screenshots are selected, right-click on any one of the selected files: After carefully selecting all the unwanted captures, move your cursor over any one of the highlighted screenshots. Perform a right-click (or a two-finger tap on your trackpad). A context menu will appear, but crucially, it will apply to all the currently selected files, not just the one you clicked on.
- Choose “Delete” from the menu: From the options presented in the context menu, select “Delete.” This command signals your intent to remove all the highlighted files from your Chromebook’s active storage.
- Confirm the action to move the selected files to the Trash: Your Chromebook will then display a confirmation prompt. This is a vital moment to review your selections and ensure you are deleting only what you intend to. Click “Delete” or the appropriate confirmation button. All the selected screenshots will then be moved to the “Trash” folder, where they will remain until you decide to permanently empty the Trash. This safety measure ensures that if you inadvertently deleted a vital image, you still have an opportunity to retrieve it.
By mastering this method, you efficiently learn how do you delete screenshots on a chromebook in batches, making file management a much smoother and less time-consuming endeavor. This capability is invaluable for maintaining an organized and uncluttered digital environment on your device.
How to Delete All Screenshots on Chromebook
There comes a time when a complete refresh of your screenshot collection is in order. Perhaps you’re preparing your Chromebook for a new purpose, or you simply want to clear a significant amount of space by removing all historical captures. For those moments, knowing how to delete all screenshots on chromebook in one go is an incredibly powerful and efficient tool. This comprehensive cleanup can free up valuable storage and give you a fresh start with your digital captures, ensuring your device remains nimble and responsive. This method extends beyond just screenshots; it can also be used as a way to how to delete all pictures on chromebook if they are all within the same folder.
Removing All Captured Images Simultaneously
To undertake this thorough removal, follow these steps with careful attention:
- Open the Files app: As with all file management tasks, begin by opening your Files app. Click the Launcher icon and select “Files” to gain access to your Chromebook’s local storage.
- Navigate to “My files” > “Downloads” (or “Images”): Proceed through the left sidebar to “My files” and then enter the “Downloads” folder. This is the most common location where all your screenshots accumulate. If you have been diligent in organizing your images into an “Images” folder, ensure you navigate there instead, or check both, to gather all the relevant files for deletion. The goal is to be in the folder that contains the entirety of the screenshots you wish to remove.
- To select all files in the current folder, press “Ctrl + A” on your keyboard: This is the command for mass selection. Once you are in the correct folder where your screenshots reside, simply press the “Ctrl” key and the “A” key simultaneously on your keyboard. This powerful shortcut will instantly highlight every single item within that folder. You will observe all files, including your screenshots and any other documents or images, becoming selected. This step is crucial for how to delete all screenshots on chromebook effectively.
- Carefully deselect any files you wish to keep by holding “Ctrl” and clicking on them: This step is paramount for preventing accidental deletion of important files. After pressing “Ctrl + A” and seeing everything highlighted, take a moment to look through the selected items. If there are any screenshots, pictures, or other files that you absolutely want to retain, hold down the “Ctrl” key again and click on each of those specific files. Clicking them while holding “Ctrl” will remove their highlight, effectively deselecting them from the group that is slated for deletion. Proceed with caution and ensure that only the truly unwanted items remain highlighted. This precise action allows you to delete all pictures on chromebook while preserving the precious few.
- Once only the screenshots you want to delete are selected, right-click on any of the highlighted files: After your careful review and deselection, move your cursor over any one of the remaining highlighted screenshots. Perform a right-click (or a two-finger tap on your trackpad). A context menu will emerge, ready to execute your command on the entire highlighted selection.
- Select “Delete”: From the context menu that appears, choose the “Delete” option. This action informs your Chromebook that you wish to remove all the currently highlighted files.
- Confirm the deletion to send all selected screenshots to the Trash: A confirmation prompt will appear, asking you to affirm your decision. This is your final opportunity to review your selection before moving the files. Click “Delete” or the appropriate confirmation button. All the selected screenshots, and any other files you left highlighted, will then be swiftly moved into the “Trash” folder. They are not permanently gone yet, but they are out of immediate sight and no longer consuming active storage space in their original location. This method is incredibly useful for those looking to quickly how to delete all pictures on chromebook.
By meticulously following these steps, you gain mastery over deleting large quantities of screenshots, ensuring a clean slate for your Chromebook’s storage. This detailed guide ensures you are confident in how do you delete screenshots on your chromebook, whether it’s one, many, or all.
Managing Screenshots on a School Chromebook
Working with a school-issued Chromebook introduces a unique set of considerations, especially when it comes to file management like deleting screenshots. These devices are often managed by the school’s IT department, which means certain functionalities, including the ability to delete files, may be subject to specific policies and restrictions. Understanding these potential limitations is crucial for students seeking how to delete screenshots on school chromebook effectively, and for understanding how to delete pictures on a school chromebook generally.
Understanding Restrictions and Permissions
School Chromebooks are not typically standalone personal devices; they are part of a larger managed ecosystem designed for educational purposes. This management often involves layers of security, software deployment, and data management policies.
- Limited Deletion Capabilities: One of the most common restrictions you might encounter is limited permission to delete certain files. The school’s IT administrator can set policies that prevent users from deleting system files, pre-installed applications, or even files saved in specific directories. This is primarily done to maintain system integrity, ensure necessary educational software remains installed, and prevent unauthorized changes to the device’s configuration. If a screenshot somehow gets saved in a protected folder, or if the system categorizes certain captures differently, you might find the “Delete” option grayed out or simply unavailable. This is a common issue for how to delete screenshots on a school chromebook.
- Automatic Cloud Storage Integration: Many educational institutions leverage Google Workspace for Education, meaning school Chromebooks are often deeply integrated with Google Drive. Screenshots taken on a school Chromebook might be automatically uploaded and synchronized with your school Google Drive account. This has important implications:
- Local vs. Cloud Deletion: If your screenshots are automatically backed up to Google Drive, deleting them from your Chromebook’s local storage (the “Downloads” folder) might not remove them from your Google Drive account. They will continue to exist in the cloud. To truly delete them, you would need to access your Google Drive through a web browser or the Google Drive app and delete them from there as well.
- Shared Drives: Some schools use shared drives where files, including screenshots, might be stored collectively. Deleting from a shared drive would require specific permissions and impact other users.
- Guest Mode Limitations: If you are using a school Chromebook in “guest mode” or as a temporary user, any files you create, including screenshots, are almost always wiped clean as soon as you log out. In such scenarios, manual deletion of screenshots becomes largely unnecessary because the system takes care of the cleanup automatically upon session termination. While this offers convenience, it also means any essential screenshots taken in guest mode are not retained.
- Specific Device Policies (e.g., how to delete screenshots on acer chromebook): While the brand of the Chromebook (like Acer, HP, Dell) doesn’t typically change the core Chrome OS file management, school policies can be customized for specific hardware deployments. For example, a school might deploy Acer Chromebooks with a particular storage configuration or set of security rules that influence file deletion. These are usually general Chrome OS policies rather than brand-specific limitations.
What to do if you can’t delete screenshots:
If you encounter difficulties deleting screenshots or how to delete pictures on a school chromebook, the most important step is to contact your school’s IT support or the designated administrator. They are the keepers of the policies and have the necessary permissions to guide you. They can:
- Explain the specific policies that are in place.
- Provide instructions for deleting files within the existing framework.
- Potentially grant temporary permissions if a specific deletion is necessary and permissible.
- Advise on managing cloud-synced files.
Attempting to bypass school-set restrictions could lead to policy violations or even issues with your device, so always seek official guidance. Understanding these parameters is key to successfully navigating how do you delete screenshots on chromebook when it is a school-issued device.
Deleting Pictures and Other Downloaded Files on Chromebook
The robust file management capabilities of Chrome OS extend far beyond just screenshots. The methods you’ve learned for how to delete a screen capture on chromebook are broadly applicable to virtually any other type of file residing on your device. Whether you’re dealing with photos downloaded from the internet, important documents, videos, or audio clips, the Files app remains your central command center for effective file deletion and organization. This section aims to broaden your understanding, showing you how to delete downloaded pictures on chromebook and manage other files with the same efficiency.
General Steps for File Deletion
To delete any picture or downloaded file, the process is quite similar to managing screenshots:
- Open the Files app: Your first step is consistently to launch the Files app. This application is the gateway to all your locally stored digital content on your Chromebook. Locate its icon via the Launcher and click to open.
- Browse to the folder containing the pictures or downloaded files you want to delete: Unlike screenshots which often default to “Downloads,” other files might be stored in various locations depending on their origin or where you chose to save them.
- For pictures saved from websites or other sources, check the “Downloads” folder (as many images are downloaded there by default). You might also find them in a dedicated “Images” folder under “My files” if you’ve moved them for organization.
- Documents (PDFs, Word files, spreadsheets) are also very commonly found in the “Downloads” folder.
- Files associated with specific Android apps might be found in dedicated folders within “My files” > “Play files”.
- If you created custom folders, navigate directly to those. The key is to know where the particular file you wish to delete is located. This knowledge is crucial for how do I delete pictures on my chromebook.
- Select the file(s): Once you’ve navigated to the correct folder, you can choose one or multiple files for deletion using the familiar selection methods:
- For a single file: Locate the specific picture or file you want to remove. Right-click on it (or perform a two-finger tap on the trackpad). From the context menu that appears, select “Delete.” This is the most straightforward approach for how to delete pictures on a chromebook one by one.
- For multiple files: If you have several pictures or documents that you wish to remove simultaneously, hold down the “Ctrl” key on your keyboard. While holding “Ctrl,” click on each individual file you want to delete. As you click, each file will become highlighted. Once all desired files are selected, right-click on any one of the highlighted files and choose “Delete” from the context menu. This method is effective for how to delete pictures off chromebook in batches.
- For all files in a folder: If you intend to clear out an entire folder’s contents, this is the quickest method. With the target folder open, press “Ctrl + A” on your keyboard. This will highlight every single item within that folder. Once all files are highlighted, right-click on any of the selected files and choose “Delete” from the menu. Remember to carefully deselect any items you wish to keep by holding “Ctrl” and clicking them again before proceeding. This is the ultimate method for how to delete pictures off your chromebook and other media.
- Confirm your decision: After selecting “Delete,” your Chromebook will present a confirmation prompt. This is an important safeguard. Review the prompt and click “Delete” or the appropriate confirmation button to proceed. The selected files will then be moved to the “Trash” folder.
By following these general steps, you gain mastery over managing and deleting any file on your Chromebook, ensuring that your digital space remains organized and free from unnecessary clutter. This comprehensive approach ensures you can easily handle how do I delete pictures on my chromebook, along with how to delete a screen capture on chromebook.
Emptying the Trash to Permanently Delete Screenshots
When you decide to remove files from your Chromebook, whether it’s a single screenshot or a collection of downloaded pictures, they are not immediately and permanently erased from your device. Instead, they are first transferred to a temporary holding place known as the “Trash” (sometimes referred to as the “Bin”) folder within the Files app. This acts as a crucial safety net, providing you with a window of opportunity to recover files if you realize you’ve deleted something important by mistake. However, to truly free up storage space on your Chromebook and permanently remove these files, you must take the additional step of emptying the Trash.
How to Empty Your Chromebook’s Trash
To complete the deletion process and reclaim your storage, follow these clear steps:
- Open the Files app: Your journey to permanently clear space begins, as always, by opening the Files app. Locate its icon in the Launcher and click on it to access your file management system.
- In the left sidebar, click on “Trash”: Once the Files app is open, direct your attention to the left sidebar. Scroll down if necessary, and you will find a dedicated folder labeled “Trash” (or sometimes “Bin”). Click on this folder. This action will display all the files that you have previously deleted and are currently awaiting permanent removal. You will see your screenshots, pictures, documents, and any other files that have been moved here.
- To permanently delete all items, click the “Empty trash” button at the top right of the window: With the “Trash” folder open and its contents displayed, look towards the top-right section of the window. You will prominently see a button or option typically labeled “Empty trash” or similar. Click this button. This command initiates the permanent removal of all files currently residing in the Trash folder.
- Confirm the action when prompted: After clicking “Empty trash,” your Chromebook will present a final confirmation dialog. This is an important final checkpoint. The system will ask you to confirm that you indeed wish to permanently delete all items in the Trash. This action is irreversible once confirmed. Carefully read the prompt and if you are certain you want to proceed, click “Delete permanently” or the appropriate confirmation button.
Once confirmed, your screenshots and all other deleted files will be irrevocably removed from your Chromebook’s local storage. This action will free up the space they once occupied, contributing to a more organized and efficient device. Remember that once the Trash is emptied, those files cannot be recovered through standard means, so always be sure of your decision before taking this final step.
Tips for Managing Your Chromebook Storage and Screenshots
Maintaining an organized and efficient Chromebook goes beyond just knowing how to delete your screenshots. Proactive file management and smart storage practices can significantly enhance your device’s performance, prevent storage bottlenecks, and streamline your workflow. By adopting these tips, you can ensure your Chromebook remains a nimble and reliable tool.
- Regular Cleanup: Make it a habit to periodically review your “Downloads” and “Images” folders. These are often the primary collection points for transient files and digital clutter, including various “how to delete screenshots on chromebook” candidates. Set a weekly or monthly reminder to browse through these folders. Ask yourself if each item is truly necessary. Delete unnecessary files, archive important ones to cloud storage, and move frequently used files to more organized, specific folders. This routine not only frees up local storage but also makes it easier to find what you need when you need it, avoiding the need for a frantic session of how to delete all pictures on chromebook.
- Utilize Google Drive: Your Chromebook is inherently designed to work seamlessly with Google Drive, offering ample cloud storage (especially with a school or work account). For any important screenshots, pictures, or documents that you wish to keep but don’t need constantly on your local device, store them in Google Drive. This practice offers several benefits:
- Free up local storage: Moving files to Drive reduces the burden on your Chromebook’s internal memory.
- Access from anywhere: Files in Google Drive can be accessed from any device with an internet connection, including other computers, tablets, or smartphones, simply by logging into your Google account.
- Automatic backup: Google Drive provides a robust cloud backup, protecting your files against loss if your Chromebook is damaged, lost, or reset.
- Collaboration: Easily share and collaborate on files with others when they are stored in Drive.
- Screenshot to Clipboard for Temporary Captures: Not every screen capture needs to be saved as a permanent file. For quick, temporary captures – perhaps to paste into an email, a document, or a chat message – use the “Ctrl + Shift + Switcher key” shortcut. After pressing this combination, you can drag to select a specific area of your screen. Instead of saving it as a file, select the option to “Copy to clipboard” from the notification that appears. This action places the screenshot directly into your Chromebook’s temporary memory, allowing you to paste it immediately without ever creating a file in your “Downloads” folder. This is an excellent technique to reduce digital clutter and avoid accumulating unnecessary screenshots that you’ll eventually need to delete. This can prevent having to figure out how to delete a screen capture on chromebook that was only ever meant to be temporary.
- Check Storage Usage: To gain a clear understanding of what is consuming your Chromebook’s storage space, regularly check the storage management settings. Go to your Chromebook’s Settings (click the time/status area in the bottom-right, then the gear icon). In the Settings menu, navigate to “Device” and then select “Storage management.” This section provides a detailed breakdown of how your storage is being utilized, often categorized by file type (e.g., Downloads, Android storage, Browsing data). This insight helps you identify major storage hogs, allowing you to prioritize which areas need the most attention for cleanup, helping you to understand how to delete pictures on a chromebook if they are taking up significant space. It empowers you to make informed decisions about managing how do I delete pictures on my chromebook and other substantial files.
By diligently following these guidelines, you can not only effectively delete screenshots on your Chromebook but also proactively manage your entire digital workspace, ensuring your device remains optimized for all your activities.
FAQs – How to Delete Screenshots on Chromebook
Your screenshots are typically stored in the “Downloads” folder within the Files app. Open the Launcher, select “Files,” then navigate to “My files” > “Downloads.” They are usually named with “Screenshot” followed by a date and time. Occasionally, they might be in an “Images” folder.
Yes, initially. When you delete screenshots, they are moved to the “Trash” folder in the Files app. You can recover them from there by selecting them and choosing “Restore.” However, once the “Trash” is emptied, the files are permanently deleted and cannot be recovered.
School Chromebooks often have administrative restrictions set by the IT department to maintain system integrity and enforce policies. These restrictions might prevent deleting certain files or limit access to specific folders. Contact your school’s IT support for guidance.
Chromebooks do not take screenshots automatically unless initiated by a user shortcut (Ctrl + Switcher key for full screen, Ctrl + Shift + Switcher key for partial). There is no “auto-screenshot” setting to disable. Ensure you are not accidentally pressing the shortcut keys.
Yes, deleting screenshots definitely frees up storage space on your Chromebook. However, for the space to be truly reclaimed, you must also empty the “Trash” folder after moving the screenshots there. Until the Trash is emptied, the files still consume storage.