IPAD • DAILYTECH.ID - Adjusting iPad settings can prevent its screen from automatically turning off or dimming, enhancing usability for various tasks. To effectively keep your iPad screen on, several methods and considerations should be explored.
To keep your iPad screen on longer or continuously, primarily adjust the Auto-Lock setting in Settings > Display & Brightness. You can set it to “Never” or a longer duration. For specific apps or charging, some apps override this, or the iPad may stay on while plugged in. Ensure “Raise to Wake” and “Attention Aware Features” are considered if experiencing unexpected dimming or turning off. Understanding these settings is key to customizing your iPad’s display behavior.
Mastering Your iPad’s Auto-Lock Settings
The Auto-Lock feature on your iPad is designed to conserve battery life and enhance security by automatically turning off the screen after a period of inactivity. However, for many users, this default behavior can be inconvenient, especially when engaged in activities that require continuous screen visibility. Mastering these settings is the first and most critical step to controlling when your iPad’s screen goes dark.
Navigating to Display & Brightness
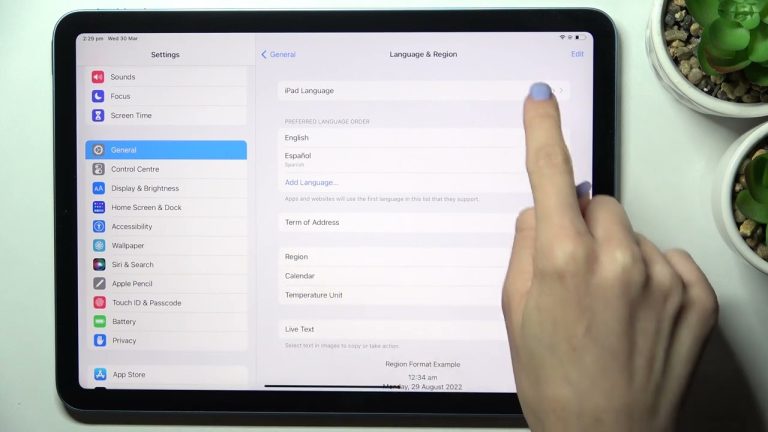
To begin, you need to locate the Auto-Lock option within your iPad’s settings. This process is straightforward and consistent across most iPadOS versions.
- Open the Settings App: Tap on the grey “Settings” icon on your iPad’s Home screen. This icon typically resembles a set of gears or cogs.
- Scroll to Display & Brightness: In the left-hand sidebar of the Settings app, scroll down until you find the “Display & Brightness” option. Tap on it.
- Locate Auto-Lock: Within the Display & Brightness menu, you’ll see various options related to your screen’s appearance and behavior. Look for the “Auto-Lock” setting. It usually displays the current time interval before your screen locks.
Understanding the default Auto-Lock intervals is important. By factory default, iPads are often set to an Auto-Lock duration of 2 minutes, meaning the screen will dim and then turn off after two minutes of no interaction. Other common default options include 30 seconds, 1 minute, 5 minutes, 10 minutes, and “Never.” These intervals are designed to offer a balance between convenience and battery conservation, but they may not suit everyone’s needs.
Setting Auto-Lock to “Never”
For users who need their iPad screen to remain active indefinitely, such as during a lengthy presentation, monitoring a process, or using it as a fixed display, setting Auto-Lock to “Never” is the most direct solution. This action will keep your iPad screen on permanently, preventing it from turning off or going dark until you manually press the power button.
Here’s a step-by-step guide to achieve this:
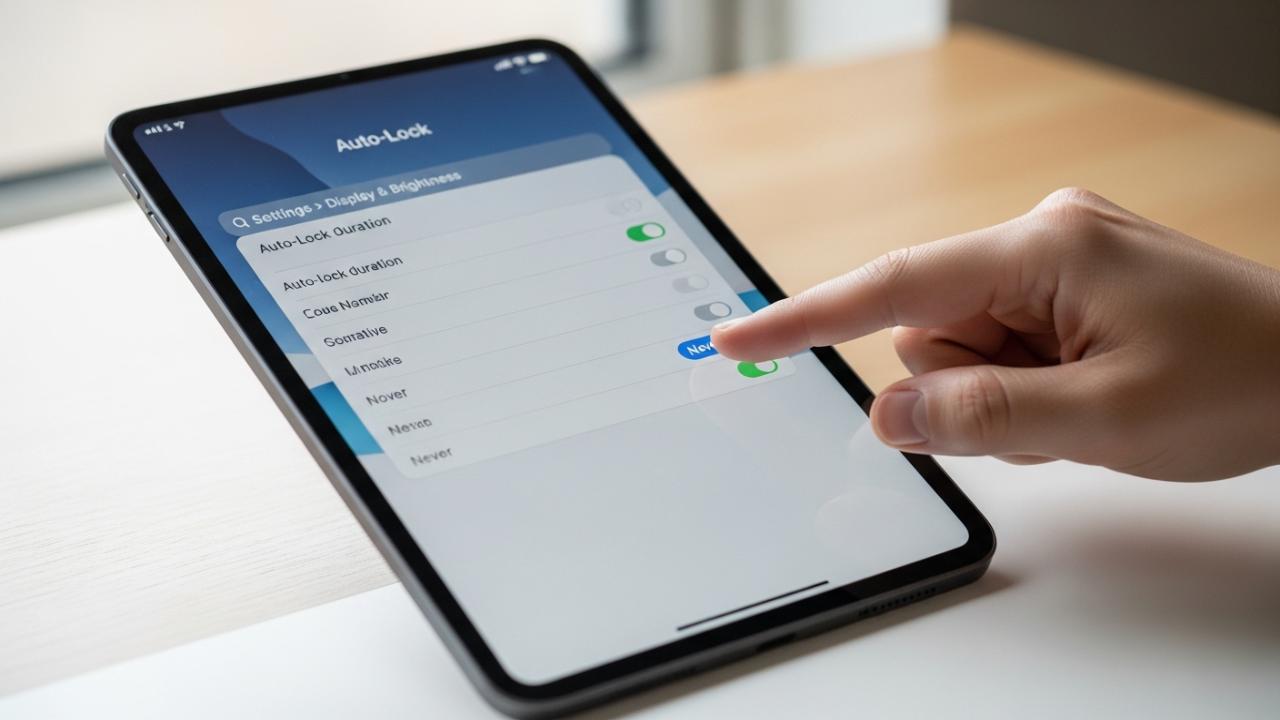
- Navigate to Auto-Lock: Follow the steps above to go to Settings > Display & Brightness > Auto-Lock.
- Select “Never”: On the Auto-Lock screen, you will see a list of time intervals. Tap on “Never.” A checkmark will appear next to “Never,” indicating it is now the active setting.
Once “Never” is selected, your iPad screen will not automatically turn off due to inactivity. This is the primary method to keep your iPad screen on all the time or to keep your iPad screen on continuously.
However, a crucial consideration for setting Auto-Lock to “Never” is its impact on battery life. Keeping the screen constantly illuminated consumes a significant amount of power. If your iPad is not connected to a power source, enabling “Never” will drain your battery much faster than usual. It is highly recommended to use this setting primarily when your iPad is plugged in or when battery conservation is not a primary concern. Otherwise, you might find yourself needing to charge your iPad more frequently.
Extending Screen On Time without “Never”
While “Never” offers maximum screen uptime, it’s not always the most practical choice due to battery implications. Many users might prefer to simply extend their screen on time rather than keep it on permanently. This approach allows for a longer period of inactivity before the screen turns off, providing convenience without completely sacrificing battery efficiency.
After navigating to Settings > Display & Brightness > Auto-Lock, you can choose longer durations from the available options, such as 5 minutes or 10 minutes. Selecting one of these options means your iPad screen will remain active for that specified period of inactivity before dimming and locking. This is an effective way to keep your iPad screen on longer without the extreme battery drain of the “Never” option. It’s especially useful for activities like reading an eBook, following a recipe, or referring to notes where you might not touch the screen constantly but still need it visible for extended periods.
Best practices for balancing convenience and power consumption involve assessing your typical usage patterns. If you frequently find your screen turning off mid-activity, but only for short durations, a 5 or 10-minute Auto-Lock might be the perfect compromise. For tasks requiring continuous attention, consider plugging in your iPad or temporarily setting it to “Never” and then reverting to a shorter duration once the task is complete. This mindful adjustment helps manage power without constant frustration from a blacking out screen.
Preventing iPad Screen Dimming and Going Dark
Beyond the Auto-Lock settings, your iPad employs other features that can affect screen brightness and cause it to dim or go dark, even when Auto-Lock is set to a longer duration or “Never.” These features are designed to optimize viewing experience and save power, but they can be counterproductive in situations where consistent brightness is required. Understanding and adjusting these settings is key to keep your iPad screen bright and to prevent your iPad screen from going dark unexpectedly.
Disabling Auto-Brightness and True Tone
Two common culprits for automatic screen dimming are Auto-Brightness and True Tone. These features use ambient light sensors to adjust your screen’s brightness and color temperature based on your surroundings. While useful for most scenarios, they can be annoying if you need a consistent display brightness.
- How to Keep iPad Screen Bright Consistently:
- Open Settings: Tap the “Settings” app icon.
- Go to Accessibility: Scroll down in the left-hand sidebar and tap “Accessibility.”
- Display & Text Size: Under the “Vision” section, tap “Display & Text Size.”
- Turn Off Auto-Brightness: Scroll to the bottom and toggle off the “Auto-Brightness” switch. This action will stop iPad screen brightness changing automatically, allowing you to manually control the luminosity.
- True Tone: True Tone adjusts the color and intensity of your display to match the ambient light, making images appear more natural. If you prefer a consistent white point and color temperature regardless of your environment, you can disable it.
- Open Settings: Tap the “Settings” app icon.
- Go to Display & Brightness: In the left-hand sidebar, tap “Display & Brightness.”
- Turn Off True Tone: Toggle off the “True Tone” switch.
Disabling these features provides more manual control over your display’s appearance, ensuring your iPad screen stays lit up at your preferred level without dynamic changes.
Adjusting Manual Brightness
Once Auto-Brightness is disabled, you gain full control over your iPad’s screen brightness. This is crucial for ensuring your iPad screen stays lit up to your preference, whether you need maximum luminosity for outdoor use or a softer glow for evening reading.
You can adjust manual brightness in two main ways:
- Via Settings:
- Go to Settings > Display & Brightness.
- You’ll see a “Brightness” slider. Drag the slider to the left to decrease brightness or to the right to increase it.
- Via Control Center:
- Swipe down from the top-right corner of your screen (for iPads with Face ID) or swipe up from the bottom edge (for iPads with a Home button) to open Control Center.
- Locate the brightness slider (it looks like a sun icon). Drag it up or down to adjust your screen’s brightness.
The impact of high brightness on battery life is substantial. A brighter screen consumes significantly more power than a dimmer one. If you keep your screen at maximum brightness, even with Auto-Lock set to a longer duration or “Never,” your battery will deplete much faster. It’s advisable to adjust brightness to the lowest comfortable level for your current environment to conserve power, especially when you need to keep the iPad screen on for extended periods away from a charger.
Understanding Attention Aware Features
For newer iPad models equipped with Face ID, Apple includes a feature called “Attention Aware Features.” This intelligent technology uses the front-facing camera to detect if you are looking at your screen. If your iPad senses your attention, it can prevent the screen from dimming or automatically locking. This is a subtle but powerful way to prevent your iPad screen from going dark when you’re looking at it.
- How it Works: When Attention Aware Features are enabled, your iPad can proactively keep the screen awake if it detects your gaze, even if the Auto-Lock timer is counting down. It can also subtly lower the volume of alerts if it detects you are looking at the screen.
- Compatibility: This feature is exclusive to iPad models with Face ID, such as iPad Pro models from 2018 onwards, and certain iPad Air and iPad mini models that include Face ID. If your iPad has a Home button, it does not support Attention Aware Features.
- Enabling/Disabling:
- Open Settings: Tap the “Settings” app icon.
- Go to Face ID & Passcode: Scroll down and tap “Face ID & Passcode.” You will need to enter your passcode.
- Toggle Attention Aware Features: Scroll down and toggle the “Attention Aware Features” switch on or off.
If you find your screen dimming unexpectedly despite having a suitable Auto-Lock setting, and you have a Face ID iPad, checking this setting is a good troubleshooting step. Ensuring it’s enabled can help maintain screen visibility without needing to constantly touch the screen.
Specific Scenarios for Keeping Your iPad Screen On
The general Auto-Lock and brightness settings cover most situations, but there are specific scenarios where users need their iPad screen to behave in a particular way. These instances often involve tasks that demand continuous screen visibility without constant interaction, from following a recipe to giving a presentation.
Keeping Screen On While Charging or Plugged In
One common scenario is wanting to keep your iPad screen on when plugged in or while charging. The good news is that iPads generally behave differently when connected to a power source compared to running on battery.
- Automatic Behavior: While there isn’t a specific setting titled “Keep Screen On While Charging,” the iPad’s system prioritizes screen activity when plugged in. If Auto-Lock is set to anything other than “Never,” the screen will still eventually lock. However, many apps (especially those designed for productivity or media playback) will often override the Auto-Lock setting when the device is plugged in, keeping the screen active for longer or indefinitely. For example, video players or presentation apps typically keep the screen on.
- Tips for Optimal Use When Charging: If you need to keep your iPad screen on while charging for an extended period, the most reliable method is still to set Auto-Lock to “Never” via Settings > Display & Brightness. Since the device is charging, the battery drain concern is mitigated. This setup is ideal for using your iPad as a digital photo frame, a continuous display for information, or for long video calls where you need the screen to stay active. Always ensure you are using an original or MFi-certified charger and cable for safety and efficient charging.
Maintaining Screen On for Specific Apps (e.g., Recipes, Reading, Presentations)
Many users need to keep the iPad screen on for certain apps, especially those used for practical, hands-on tasks. This includes how to keep iPad screen on for recipes in the kitchen, how to keep iPad screen on while reading an eBook, or for critical presentations.
- Utilizing App-Specific Settings: Some apps include their own internal settings that can override the iPad’s system-wide Auto-Lock. For instance, many recipe apps offer a “keep screen on” option within their settings to prevent the screen from turning off while you’re cooking. Similarly, e-reader apps might have settings to extend screen timeout specifically within the app. Always check an app’s individual settings or preferences if you find yourself constantly tapping the screen to prevent it from going dark during use.
- How to Keep iPad Screen On One App for Continuous Viewing: If an app doesn’t have a specific “keep screen on” feature, and you only need the screen to stay on for that particular application, you can temporarily adjust your iPad’s global Auto-Lock to “Never” before opening the app. Remember to switch it back to a shorter duration once you’re done to save battery life. For a more controlled environment, Guided Access (discussed below) can be an excellent tool for specific apps, ensuring the screen remains active and focused on one application.
Keeping iPad Lock Screen On
Sometimes the goal isn’t just to keep the main screen on, but specifically to keep the iPad lock screen on, perhaps to display the clock, widgets, or a photo without needing to unlock the device.
- Displaying Clock or Widgets on the Lock Screen for Longer: By default, once your iPad locks, the screen will eventually go completely dark according to your Auto-Lock settings. There isn’t a native iPadOS feature that allows the lock screen to remain continuously illuminated while the device is locked, similar to an “always-on display” found on some other devices. The primary way to extend the lock screen’s visibility before it goes dark is to set the Auto-Lock to a longer duration (e.g., 10 minutes) or “Never.” However, this means the device itself remains unlocked or easily accessible, which might compromise security if left unattended.
- Adjusting Lock Screen Settings for Convenience: For quick glances at the clock or widgets, ensure that “Raise to Wake” is enabled (Settings > Display & Brightness). This will automatically wake your iPad’s screen when you lift it, providing a brief view of the lock screen without pressing any buttons. For more control over lock screen content, customize your widgets via the Lock Screen customization options (long-press on the lock screen or via Settings > Wallpaper). While this doesn’t keep the lock screen on indefinitely, it optimizes the information displayed when it does wake.
Using AssistiveTouch to Keep Screen Active (Without Touching It)
For situations where you need the screen to stay on without any physical interaction, such as during a demonstration or when using the iPad as a kiosk, AssistiveTouch can offer a creative workaround.
- Creative Workarounds for Keeping the Screen Active: AssistiveTouch provides an on-screen button that can perform various gestures and system functions. One lesser-known trick is to assign a custom gesture to the AssistiveTouch menu that mimics a tap on the screen. Even a very subtle tap can reset the Auto-Lock timer, keeping the screen active.
- How to Set Up and Use AssistiveTouch to Prevent Auto-Lock:
- Enable AssistiveTouch: Go to Settings > Accessibility > Touch > AssistiveTouch and toggle it on. A floating button will appear on your screen.
- Create a Custom Gesture (Optional but useful):
- In the AssistiveTouch menu, tap “Create New Gesture.”
- Lightly tap the screen once in the center. Save the gesture (e.g., “Keep Alive”).
- Use the Gesture: Tap the AssistiveTouch button, then tap “Custom,” and select your “Keep Alive” gesture. The iPad will perform the tap, resetting the Auto-Lock timer without you needing to touch the screen directly. This can be combined with Auto-Lock set to “Never” for continuous operation or used with a longer Auto-Lock setting to extend screen time without interaction.
- Important: This method still consumes battery and is more of a workaround for specific scenarios where direct interaction is impossible or undesirable.
Keeping the Screen Still for Activities like Tracing or Drawing
Beyond keeping the screen on, users might also need to keep the iPad screen still, meaning preventing its orientation from rotating or locking interaction to a specific app. This is particularly useful for activities like digital tracing, drawing, or for children using educational apps.
- Locking Screen Rotation to Maintain Orientation: This is a fundamental feature for maintaining a fixed view.
- Open Control Center: Swipe down from the top-right corner (Face ID iPads) or swipe up from the bottom (Home button iPads).
- Tap Orientation Lock: Look for the icon that looks like a padlock with an arrow circling it. If it’s white with a red background, it’s enabled; if grey, it’s off. Tap it to toggle. When enabled, your screen will remain in its current orientation (portrait or landscape) even if you rotate the iPad. This is crucial for how to keep iPad screen still or how to keep iPad screen in landscape for specific tasks.
- Using Guided Access for Focused, Uninterrupted Screen Time: Guided Access is a powerful accessibility feature that locks your iPad to a single app and allows you to disable specific screen areas, touch input, or even the side/home button. It’s excellent for keeping your iPad screen on one app for specific activities, preventing accidental exits, or stopping unwanted screen interactions.
- Enable Guided Access: Go to Settings > Accessibility > Guided Access and toggle it on. Set a passcode.
- Start Guided Access: Open the app you want to use. Triple-click the Side button (Face ID iPads) or Home button (Home button iPads).
- Configure Options: In the Guided Access menu, you can draw circles around areas of the screen to disable touch, set time limits, and crucially, ensure the screen remains active. Tap “Options” in the bottom-left to adjust settings.
- Start: Tap “Start” in the top-right corner.
- End Guided Access: Triple-click the Side/Home button again and enter your passcode.
Guided Access ensures a focused experience, keeping the screen on and interaction limited to the desired app, ideal for tracing, drawing, or maintaining a specific display.
Troubleshooting Auto-Lock Issues
Occasionally, users encounter issues where the Auto-Lock setting doesn’t function as expected, or the option itself is greyed out and inaccessible. These problems can be frustrating when you’re trying to control your iPad’s screen behavior.
When Auto-Lock is Greyed Out or Not Working
One of the most common complaints is when the “Auto-Lock” option in Settings > Display & Brightness is greyed out, preventing you from changing it.
- Common Reasons for the Auto-Lock Option Being Disabled:
- Guided Access: If Guided Access is currently active or was recently used and not properly exited, it can sometimes temporarily grey out the Auto-Lock option. Guided Access locks the device to a single app and can override system-wide settings.
- Screen Time Restrictions: Screen Time, Apple’s feature for monitoring and limiting device usage, can also impose restrictions. If “Content & Privacy Restrictions” are enabled within Screen Time, certain system settings, including Auto-Lock, might be locked down by a parent or administrator.
- Low Power Mode: When your iPad is in Low Power Mode, the Auto-Lock setting is automatically forced to 30 seconds or 1 minute to conserve battery, and the option may become greyed out.
- Managed Devices: For iPads managed by an organization (e.g., school or company devices), IT administrators can enforce profiles that restrict changes to certain settings, including Auto-Lock.
- Solutions and Workarounds for Greyed-Out Auto-Lock Settings:
- Check Guided Access: Ensure Guided Access is completely turned off. Triple-click the Side/Home button and enter your passcode to end any active Guided Access session. If it’s already off, toggle it off and then on again in Settings > Accessibility > Guided Access, then try checking Auto-Lock.
- Review Screen Time Settings:
- Go to Settings > Screen Time.
- Tap “Content & Privacy Restrictions.” If this is enabled, you might need to enter a Screen Time passcode.
- Under “Allow Changes,” look for “Passcode Changes” or “Account Changes” and ensure they are not set to “Don’t Allow.” Sometimes, a broader restriction can affect Auto-Lock. Alternatively, temporarily disable “Content & Privacy Restrictions” to see if Auto-Lock becomes available.
- Turn Off Low Power Mode: If your iPad is in Low Power Mode, turn it off. You can do this in Settings > Battery or via Control Center. Once Low Power Mode is off, Auto-Lock should become editable again.
- Contact Administrator (for Managed Devices): If your iPad is managed by an organization, you’ll need to contact your IT administrator to request a change to the device profile that might be restricting Auto-Lock settings.
- Restart iPad: A simple restart can often resolve minor software glitches that might be causing the Auto-Lock option to appear greyed out.
These steps should help in troubleshooting how to change iPad settings to keep screen on when the Auto-Lock option is not accessible.
Software Updates and System Restarts
Sometimes, seemingly complex issues with screen behavior or settings are simply due to minor software glitches that can be easily remedied.
- Addressing Minor Glitches by Ensuring Your iPadOS is Up to Date: Apple regularly releases iPadOS updates that include bug fixes, performance improvements, and security enhancements. An outdated operating system can sometimes lead to unexpected behavior in settings or features.
- Check for Updates: Go to Settings > General > Software Update. If an update is available, download and install it. Ensure your iPad is connected to Wi-Fi and has sufficient battery life or is plugged in before starting an update.
- Performing a Soft Reset to Resolve Temporary Issues: A soft reset (restarting your iPad) can clear temporary memory issues or minor software conflicts that might be affecting your screen’s auto-lock or dimming behavior.
- For iPads with Face ID: Press and hold the Top button and either Volume button until the power off slider appears. Drag the slider, then wait for your iPad to turn off. To turn it back on, press and hold the Top button until you see the Apple logo.
- For iPads with a Home button: Press and hold the Top button until the power off slider appears. Drag the slider, then wait for your iPad to turn off. To turn it back on, press and hold the Top button until you see the Apple logo.
These basic troubleshooting steps can often resolve underlying issues that impact your ability to keep your iPad screen on as desired.
Optimizing Screen Orientation and Rotation
While not directly related to keeping the screen on, controlling screen orientation is crucial for maintaining a comfortable and stable viewing experience for many tasks. Preventing the iPad screen from rotating automatically ensures your content stays fixed in your preferred landscape or portrait view.
Locking Screen Orientation
The iPad’s accelerometer detects its orientation and automatically rotates the screen to match. While often convenient, this can be frustrating when reading in bed, lying down, or trying to view content in a specific fixed orientation.
- How to Stop iPad Screen Rotating Automatically:
- Open Control Center: For iPads with Face ID (no Home button), swipe down from the top-right corner of the screen. For older iPads with a Home button, swipe up from the bottom edge of the screen.
- Locate and Tap the Orientation Lock Icon: In Control Center, look for an icon that looks like a padlock with a circular arrow around it. This is the “Rotation Lock” button.
- Toggle the Lock: Tap the icon. If it turns white with a red background, it means the orientation is locked in its current state. If it’s grey, it’s unlocked.
Once activated, your screen will remain in its current orientation (landscape or portrait) until you toggle the Rotation Lock off again. This is how to lock iPad screen orientation and how to keep iPad screen in landscape or portrait, depending on your current need.
Benefits for Specific Activities
Locking screen orientation offers significant benefits for a variety of activities, enhancing usability and comfort.
- Maintaining a fixed view for reading: When reading an eBook or a long article, especially in bed, the screen can often rotate unexpectedly with minor movements. Locking it in portrait mode ensures an uninterrupted reading experience.
- Video Playback: For some videos or apps, landscape mode is preferred. Locking the screen prevents accidental rotation to portrait if you shift your iPad, ensuring the video fills the screen correctly.
- Specific Apps: Many apps are optimized for a particular orientation. Locking the screen prevents these apps from trying to adapt to an unwanted orientation, which can sometimes lead to layout issues or a less user-friendly experience. For example, some sketching apps perform best in a fixed landscape mode.
By effectively utilizing the screen orientation lock, you gain greater control over your iPad’s display, allowing for a more stable and pleasant user experience during activities that require a consistent visual presentation.
FAQs – How to Keep iPad Screen On
To make your iPad screen stay on indefinitely, go to Settings > Display & Brightness > Auto-Lock and select “Never.” Be aware that this will consume significantly more battery, so it’s best used when your iPad is plugged in or during specific tasks where continuous screen visibility is essential.
A greyed-out Auto-Lock option often indicates that Guided Access is active, Low Power Mode is on, or Screen Time restrictions are enabled. Check these settings first. You may also need to restart your iPad or ensure it’s not a managed device with administrator restrictions.
Yes, keeping the iPad screen constantly on, especially at high brightness, significantly impacts battery life. The display is one of the most power-hungry components. For continuous screen-on time, it is highly recommended to keep your iPad connected to a power source.
To prevent dimming, disable “Auto-Brightness” in Settings > Accessibility > Display & Text Size, and “True Tone” in Settings > Display & Brightness. Also, check “Attention Aware Features” on Face ID models (Settings > Face ID & Passcode) to prevent dimming when you’re looking at the screen.
While the main Auto-Lock setting (Settings > Display & Brightness) is primary, some apps offer their own “keep screen on” settings. For focused, uninterrupted use in one app, consider using Guided Access (Settings > Accessibility > Guided Access), which can lock your iPad to a single app and keep the screen active.