IPAD • DAILYTECH.ID - To change the language on an iPad, open the Settings app, tap General, and select Language & Region. Tap iPad Language, choose your preferred language from the list, and confirm the change. To add a typing language, go to Settings > General > Keyboard to manage your keyboard layouts. Changing these settings will update your menus and default system interface immediately.
Changing the language on your iPad is a straightforward process that applies to the entire iPadOS system, from menus to system alerts. The following steps will guide you through updating your display, keyboard, and specific app settings to match your linguistic preferences. Whether you are using the device for professional translation, educational purposes, or simply to revert a mistaken setting, understanding the hierarchy of language preferences in iPadOS is essential for a seamless user experience.
How to Change the System Language on Your Apple iPad
The primary display language of your iPad affects everything from the text under your app icons to the notifications you receive from the system. Because iPadOS is designed with a global audience in mind, it supports dozens of localized dialects and scripts. The process for changing the device language is identical across the current lineup, including the iPad Pro, iPad Air, iPad Mini, and the standard iPad 9th and 10th generation models.
Navigating the Language & Region Menu
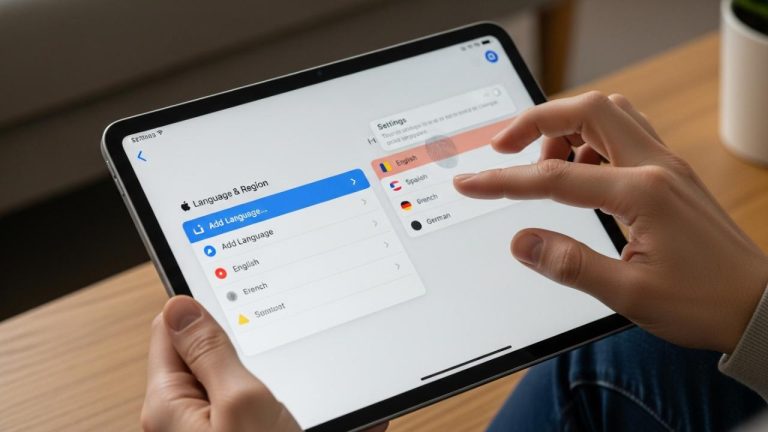
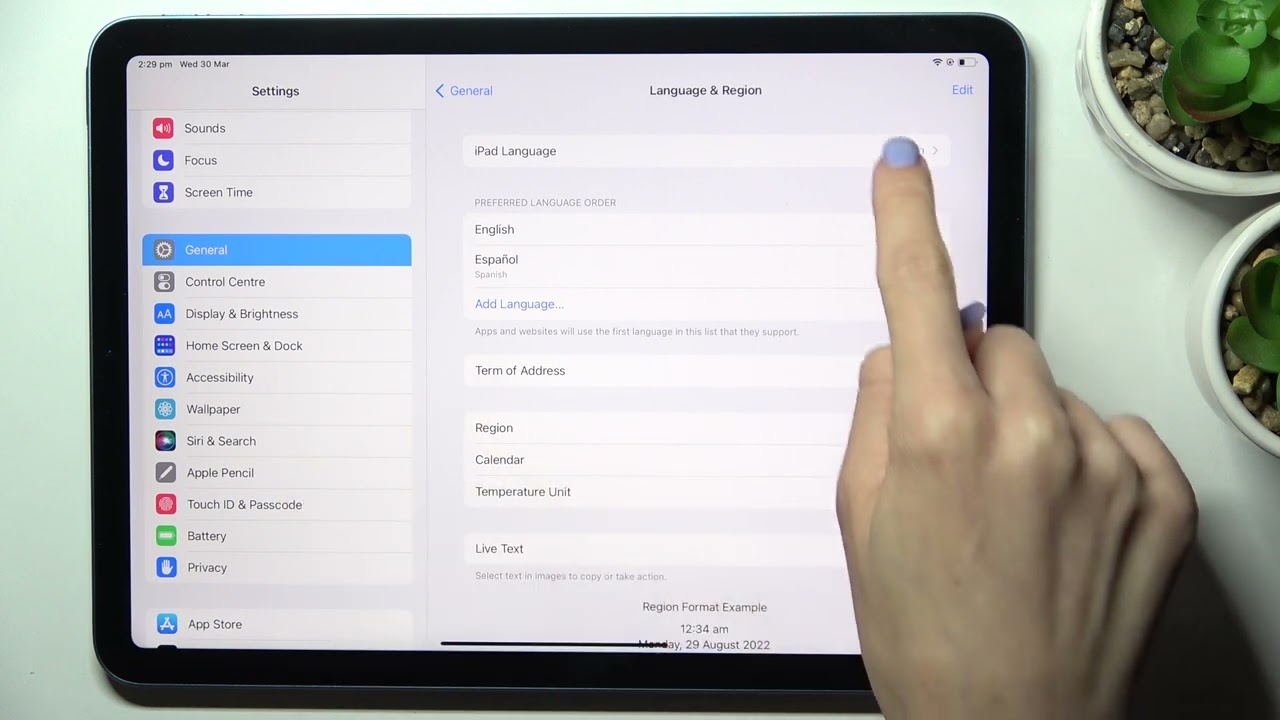
To begin, locate the Settings app on your Home Screen; it is the icon that looks like a set of silver mechanical gears. Once inside, scroll down on the left-hand sidebar until you find General, which is also identified by a single gear icon. Within the General menu, look for the option labeled Language & Region. This menu is the command center for your device’s linguistic identity.
Once you tap iPad Language, you will see a comprehensive list of available languages. When you select a new language, a prompt will appear at the bottom of the screen asking you to confirm the change. Upon confirmation, your iPad will briefly display a black screen with the message “Setting Language.” After a few seconds, the interface will reload in your chosen language. It is important to note that this does not delete your previous language settings; rather, it moves your new selection to the top of the “Preferred Languages” list.
How to Change the Language Back to English from a Foreign Script
One of the most common issues iPad users face is accidentally switching the system language to one they do not speak, such as Chinese, Arabic, or Japanese. Navigating back to English can be difficult when you cannot read the menu labels. To fix this, you must rely on visual cues and icon positions.
First, find the Settings gear icon. In the left-hand column, look for the General icon (the single gear). On the right side of the screen, look for the section that contains “Date & Time.” The Language & Region option is typically located directly below the Date & Time settings. Once inside that menu, the top option is always the iPad Language toggle. Tap it, and scroll through the list until you see English. Because language names are always written in their native script as well as the current system script, “English” will always be recognizable. Select it and tap the red confirmation button that appears.
Model-Specific Considerations for iPad Pro and iPad Air
While the software steps remain the same, users of high-end models like the iPad Pro or iPad Air M2 may notice that changing the system language also affects features like Stage Manager or the Apple Pencil Scribble function. For instance, if you change your language to one that does not support the Scribble handwriting-to-text feature, that specific functionality may be disabled until you add a compatible keyboard. Always ensure that your primary system language aligns with your most frequently used input methods to maximize the utility of your hardware.
How to Change the Keyboard Language on iPad
Adding a language to your iPad system does not automatically change how you type. You must independently manage your keyboard layouts to ensure you can access special characters, accents, or different alphabets. This is particularly vital for students and professionals who switch between English and other languages frequently.
Managing the Software Keyboard
To add a new typing language, go to Settings > General > Keyboard. At the very top, tap Keyboards and then select Add New Keyboard. You can search for any language, and in many cases, you can choose specific regional layouts, such as QWERTY, AZERTY, or QWERTZ.
Once you have multiple keyboards installed, you can switch between them while typing in any app. On the virtual on-screen keyboard, look for the Globe icon or the Emoji icon in the bottom left corner. Long-pressing this icon will bring up a menu of all your active keyboards, allowing you to slide your finger to the one you need.
Using External Keyboards: Magic Keyboard and Logitech
If you use a physical keyboard, such as the Apple Magic Keyboard, the Logitech Combo Touch, or a standard Bluetooth keyboard, the process is slightly different. When a hardware keyboard is connected, your iPad may default to an automatic layout based on the system language.
To manually adjust this, go to Settings > General > Keyboard and select Hardware Keyboard. Here, you can map your physical keys to a specific language layout. For example, if you have a physical US English keyboard but want to type in Spanish, you can set the Hardware Keyboard layout to Spanish. This allows you to use familiar key combinations for tildes and accents even if they aren’t printed on the physical keys.
Keyboard Shortcuts for Instant Language Switching
For those who use their iPad as a laptop replacement, speed is key. You do not need to click through menus to change your typing language. If you are using an external keyboard, the quickest way to cycle through your active languages is by pressing Control + Space. This shortcut brings up a small overlay on the screen showing your available keyboards. Pressing the spacebar while holding Control allows you to cycle through the list instantly. Users of the Magic Keyboard can also often use the dedicated Globe key located in the bottom-left corner of the keyboard to achieve the same result.
Changing Language Settings for Specific Apps
In older versions of iPadOS, changing the system language was an all-or-nothing affair. Today, the “Per-App Language” feature allows you to keep your iPad interface in English while setting specific apps to function in a different language.
Adjusting Languages for Productivity Apps
If you are a student using Google Docs or Microsoft Word, you might prefer the app’s proofing tools and menus to be in a specific language. To do this, do not look inside the app itself. Instead, open the iPad Settings app and scroll all the way down the left-hand sidebar until you see the list of installed apps. Tap on Word or Google Docs, and look for the Preferred Language section. Here, you can override the system default and select a specific language just for that application.
Language Customization for Streaming and Social Media
This feature is equally useful for entertainment. If you are learning a new language, you might want Netflix, YouTube, or Roblox to display in that target language to immerse yourself. By following the same steps—navigating to the specific app settings within the main iPad Settings menu—you can set Netflix to French or YouTube to Spanish. This ensures that navigation menus and suggested content titles align with your choice, even if your iPad’s lock screen and messages remain in English.
Adjusting Siri, Dictation, and Search Preferences
Your iPad doesn’t just display text; it also listens and speaks. Siri and the system-wide dictation features have their own independent language settings, which are crucial for voice-to-text accuracy.
Changing the Siri Voice and Language
If you want to practice your speaking skills or if you prefer a different accent, you can change Siri’s language by going to Settings > Siri & Search. Tap on Language to change what Siri understands, and tap Siri Voice to change the accent and gender of the response. Changing Siri’s language is independent of your iPad’s display language; you can have an English interface while speaking to Siri in German.
Dictation and Text-to-Speech Settings
Dictation allows you to talk instead of type. To ensure the iPad understands you, go to Settings > General > Keyboard and make sure Enable Dictation is turned on. Below that, you will see Dictation Languages. You should select all the languages you plan on speaking. When you use the microphone icon on the keyboard, the iPad will automatically attempt to detect which of your selected languages you are speaking, providing a seamless hands-free experience.
FAQs – How to Change the Language on a iPad
This usually happens due to a synced Apple ID setting or an accidental change in the Language & Region menu. If you have “Share Across Devices” enabled on an iPhone or Mac, changing the language there might trigger a change on your iPad. Simply go to Settings > General > Language & Region to revert it.
Look for the gray Settings gear icon. Tap the General gear icon in the sidebar. Select the fourth block of text in the right-hand menu (Language & Region). Tap the top option, find English in the list, and confirm your choice by tapping the red text prompt at the bottom.
Yes. Go to Settings > General > Keyboard > Keyboards and add a new language. You can then toggle between typing languages using the Globe icon on the software keyboard or by pressing Control + Space on a physical keyboard, while your iPad menus remain in your primary language.
Open the main Settings app and scroll down to the bottom where your apps are listed. Tap on the specific app you wish to modify. Under the Preferred Language section, select the language you want that app to use, which will override the system-wide language setting.
Not necessarily. While some iCloud settings sync, the system display language is typically device-specific. However, if you have multiple devices, it is a good idea to check the Language & Region settings on each one to ensure they are configured to your preference independently.