PC • DAILYTECH.ID - A slow PC is often caused by accumulated cache and temporary files that build up over time. If your system feels laggy or storage is running low, learning how to clear cache on Windows 10 can quickly improve performance without installing additional software.
To clear cache on Windows 10, go to Settings > System > Storage > Temporary files, select the files you want to remove, and click Remove files. You can also use Disk Cleanup or the Run command to delete cache instantly.
In this guide, you’ll learn how to clear cache on Windows 10 step by step, including system cache, app data, browser files, and RAM to keep your PC running fast and smooth.
What is Cache on Windows 10 and Why It Slows Down Your PC
Cache on Windows 10 is temporary data stored by the system, applications, and browsers to help speed up processes and reduce loading times. This includes files like thumbnails, system logs, update data, and browsing history that allow your computer to respond faster during repeated tasks.
However, as cache builds up over time, it can take up significant storage space and start affecting performance. Instead of improving speed, outdated or corrupted cache can lead to system lag, app errors, and slower overall performance, making it important to clear cache regularly.
How to Clear Cache on Windows 10 (Step-by-Step)
Clearing cache on Windows 10 involves removing different types of temporary data stored by the system, applications, and browsers. These files are created to speed up performance, but over time they can pile up, take up storage space, and even cause system slowdowns or errors.
By following the methods below, you can target each type of cache and clean your PC more effectively. This helps improve speed, free up disk space, and keep your system running smoothly without unnecessary files.
1. Clear Cache Using Disk Cleanup
Disk Cleanup is one of the most effective tools for removing system-level cache, including Windows update files, temporary installation data, and other hidden files that can consume several gigabytes of storage.
Steps:
- Search Disk Cleanup in the Start menu
- Select your main drive (C:)
- Click Clean up system files
- Select items like Windows Update Cleanup
- Click OK → Delete Files
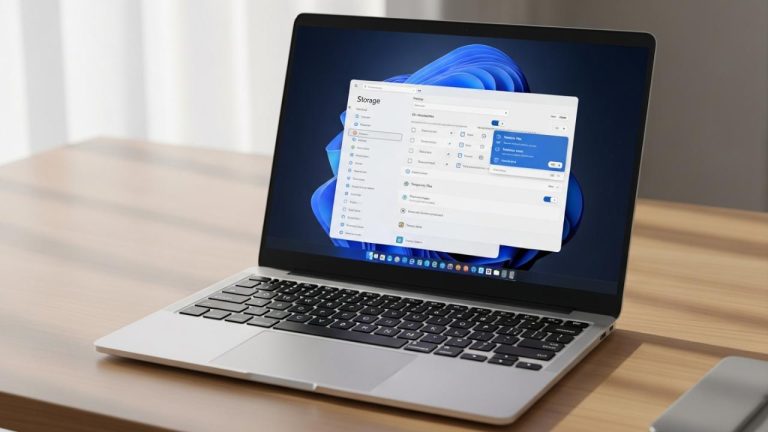
2. Clear Temporary Files via Settings
This method uses the modern Windows Settings interface, making it easier for beginners to identify and remove unnecessary files. It also provides a clear breakdown of what is taking up space on your system.
Steps:
- Open Settings
- Go to System > Storage
- Click Temporary files
- Select the files you want to remove
- Click Remove files
You can also enable Storage Sense to automatically clear temporary files and prevent future buildup.
3. Clear Cache Using Run Command
Using the Run command allows you to directly access hidden system folders where temporary files are stored. This method is faster and helps remove leftover cache that may not appear in standard cleanup tools.
Steps:
- Press Win + R
- Type
%temp%→ delete all files - Type
temp→ delete all files - Type
prefetch→ delete all files
4. Clear DNS Cache on Windows 10
DNS cache stores information about websites you’ve visited to speed up future access. However, outdated or corrupted DNS data can cause connection issues or prevent websites from loading properly.
Steps:
- Open Command Prompt as administrator
- Type
ipconfig /flushdns - Press Enter
5. Clear App Cache on Windows 10
Many applications store local cache files such as images, scripts, and logs to improve loading speed. Over time, these files can become too large or corrupted, leading to lag, crashes, or unexpected errors.
Steps (Discord):
- Press Win + R
- Type
%appdata% - Open the Discord folder
- Delete Cache, Code Cache, and GPUCache
Steps (Roblox):
- Go to
%localappdata%\Roblox - Delete Downloads and Logs
6. Clear Browser Cache on Windows 10 (Chrome)
Browser cache stores website data such as images and scripts to load pages faster. However, too much cached data can slow down your browser and cause outdated content to appear.
Steps:
- Open Chrome
- Press Ctrl + Shift + Delete
- Set time range to All time
- Check Cached images and files and Cookies
- Click Clear data
7. Clear RAM Cache on Windows 10
RAM cache (also known as standby memory) is used to store frequently accessed data for faster performance. In some cases, Windows may not release this memory efficiently, which can affect performance during heavy tasks.
Steps:
- Restart your PC (fastest method)
- Or use RAMMap → select Empty Standby List
Best Apps to Clear Cache on Windows 10 Automatically
If you don’t want to clean cache manually, using dedicated software can make the process faster and more efficient. These tools scan your system, detect unnecessary files, and remove cache automatically in just a few clicks. Some also include performance optimization features like startup management and real-time monitoring.
CCleaner
One of the most widely used PC cleaning tools, designed to remove temporary files, browser cache, and system junk quickly. It’s known for its simplicity and ease of use, making it ideal for beginners.
Advanced SystemCare
An all-in-one optimization tool that cleans cache, improves performance, and manages startup programs. It’s especially useful for users who want an automatic, one-click solution.
Wise Disk Cleaner
A lightweight and free tool focused on removing temporary files, browser data, and junk files. It’s effective for freeing up disk space without complex setup.
AVG TuneUp
A beginner-friendly tool that automates system maintenance, clears cache, and helps improve overall performance with minimal effort.
Ashampoo WinOptimizer
A more advanced utility that offers deep cleaning, system optimization, and additional privacy tools for better control over your PC.
Using these apps can save time compared to manual methods, especially if you want automated cleaning or deeper system optimization. However, for most users, built-in Windows tools are still effective for basic cache cleanup.
How Often Should You Clear Cache on Windows 10
For most users, clearing cache on Windows 10 every 1 to 3 months is enough to maintain good performance. Temporary files build up naturally over time, but they don’t need to be removed too frequently unless you notice slowdowns or low storage space.
If you use your PC for gaming, video editing, or other heavy tasks, clearing cache once a month can help keep your system running smoothly. You can also enable Storage Sense to automatically remove temporary files and reduce the need for manual cleanup.
Tips to Keep Windows 10 Fast After Clearing Cache
Clearing cache is only the first step—keeping your system fast requires simple ongoing maintenance. Without proper habits, temporary files and background processes will build up again and slow down your PC over time.
- Enable Storage Sense to automatically remove temporary files and prevent cache buildup
- Disable unnecessary startup programs to reduce boot time and background load
- Uninstall unused applications that may store unnecessary data
- Keep Windows updated to benefit from performance improvements and bug fixes
- Avoid filling up your system drive (C:) to maintain optimal performance
By following these tips, you can keep your Windows 10 running smoothly and reduce the need for frequent manual cache cleaning.
How to Clear Cache on Windows 7, 8, and 11 (Optional)
If you’re using a different Windows version, the process to clear cache is largely similar, although the interface may look slightly different. The goal remains the same—remove temporary files and system cache to improve performance.
On Windows 7 and 8, you can use the Disk Cleanup tool and the Run command to clear cache. Open Disk Cleanup from the Start menu, select your main drive, and remove temporary files. You can also press Win + R, type %temp%, and delete all files in the folder.
On Windows 11, the process is almost identical to Windows 10 but with a more modern interface. You can follow a complete step-by-step guide on how to clear cache on Windows 11 to remove temporary files, app cache, and browser data effectively.
While the steps may vary slightly, all Windows versions use similar methods to manage and clear cache efficiently.
FAQs – How to Clear Cache on Windows 10
The fastest way is to go to Settings > System > Storage > Temporary files, select the files, and click Remove files.
Yes, cache files are temporary data that can be safely removed without affecting your personal files or system.
No, clearing cache only removes temporary system and app data. Your documents, photos, and videos will not be affected.
Your PC may be slow due to high CPU usage, low RAM, background programs, or hardware limitations.
There is no single shortcut, but you can press Win + R and type %temp% to quickly access temporary files.
For most users, clearing cache every 1–3 months is enough to maintain performance and free up storage space.