
APPS • DAILYTECH.ID - To change the background color in Google Docs, open your document and navigate to File > Page setup. Click the Page color icon, select your preferred shade from the palette, and click OK. On mobile, tap the three-dot menu, select Page setup, and tap Page color to adjust the background.
Changing the visual theme of your document is a simple process that can significantly improve readability or align your work with specific branding requirements. To change the background color in Google Docs, open your document and navigate to File > Page setup. Click the Page color icon, select your preferred shade from the palette, and click OK. On mobile, tap the three-dot menu, select Page setup, and tap Page color to adjust the background. Follow the detailed steps below to customize specific elements like tables, text, and headers.
Changing the Page Background Color on Desktop
The most common way to change the entire document’s appearance is through the Page Setup menu. This allows you to apply a uniform color to every page in your document. Whether you want a professional cream tint to reduce eye strain or a high-contrast black background for a modern presentation, the process remains the same across all desktop browsers, including Chrome, Safari, and Firefox.
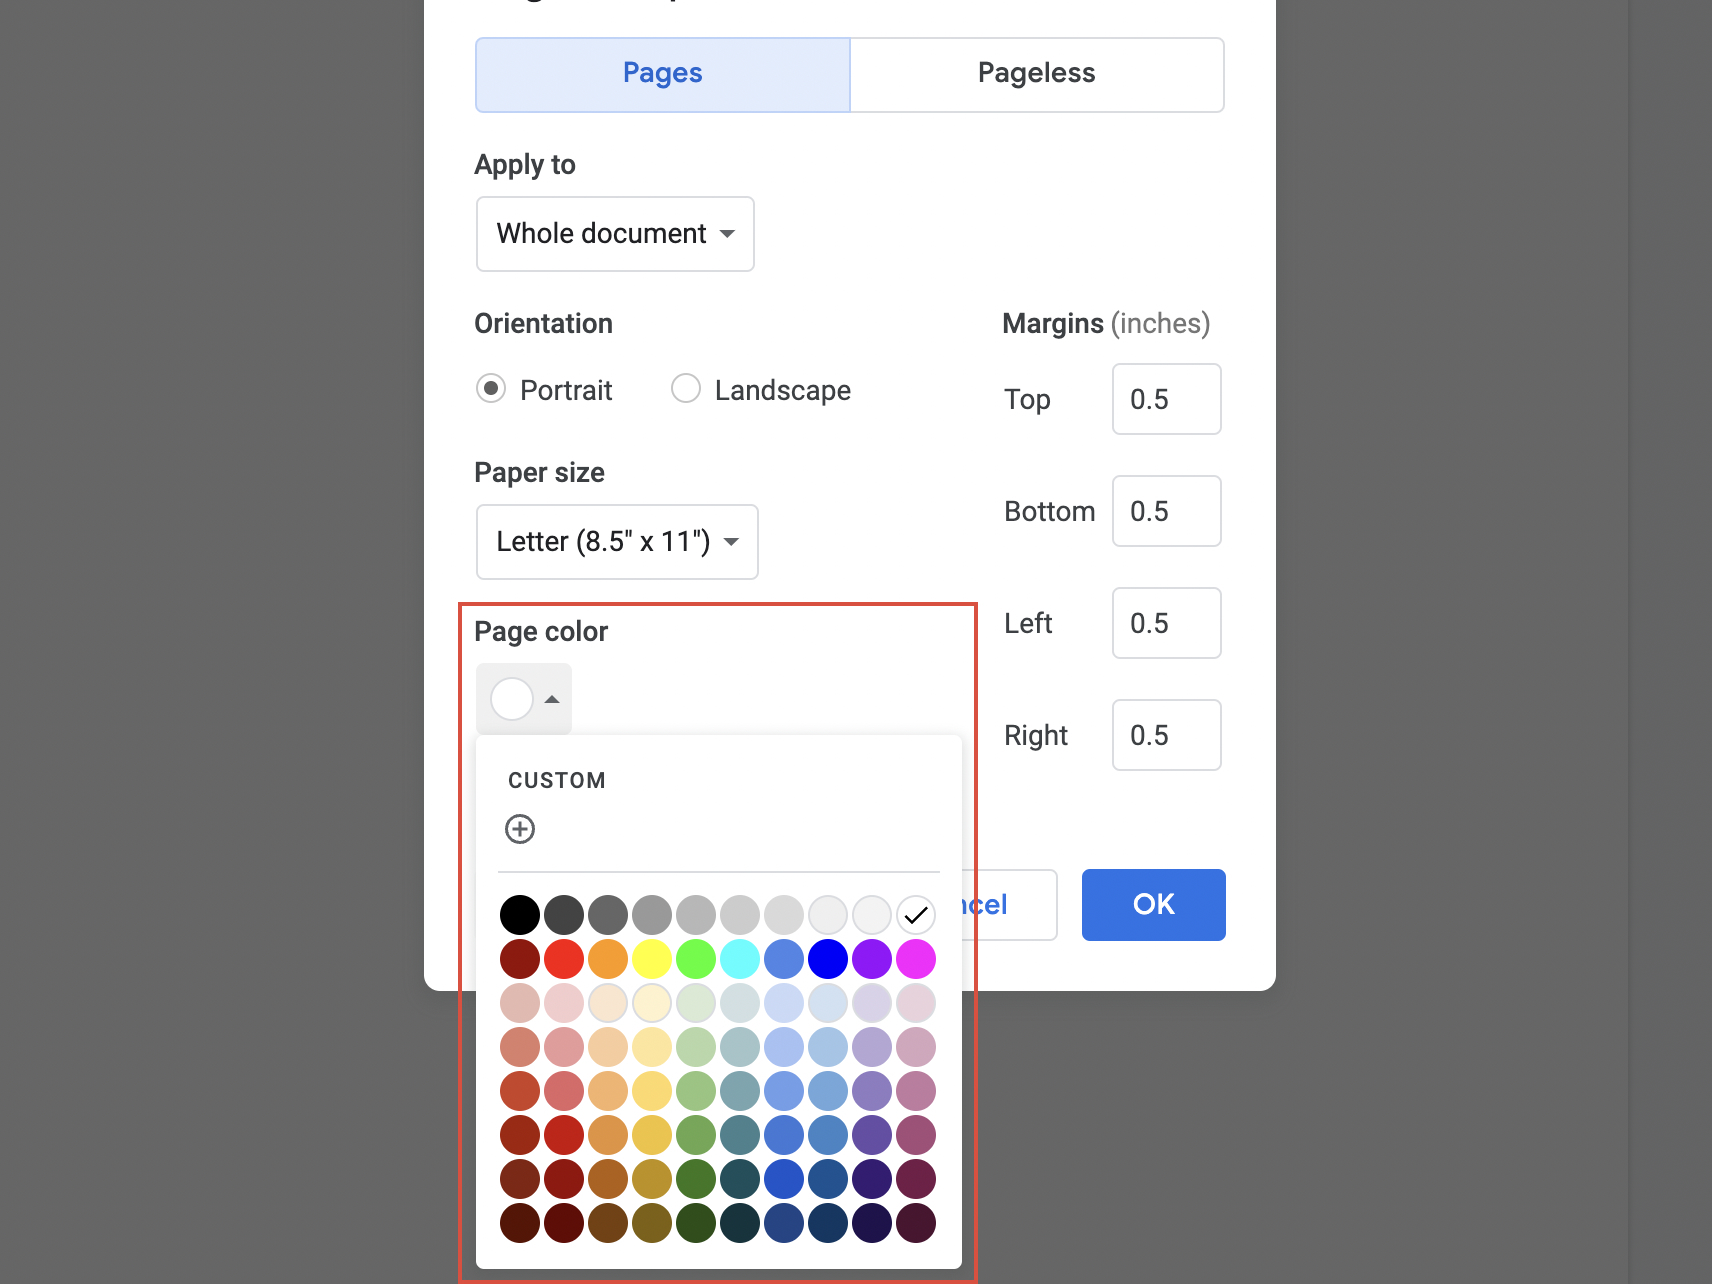
To begin, open your Google Doc and click on the File tab in the top-left corner of the interface. Scroll down to the bottom of the dropdown menu and select Page setup. This will trigger a pop-up window where you can manage various layout settings. In the “Page setup” dialog box, ensure that the “Pages” tab is selected at the top. You will see a circular icon labeled Page color. Clicking this icon opens a standard color palette provided by Google.
If the basic colors do not meet your needs, you can click the + (plus) icon under the “Custom” section to open a HEX code editor. This is particularly useful for administrative professionals who need to match specific brand guidelines using exact color values. Once you have selected your desired hue, click OK. If you want every new document you create to start with this specific background color, you can click the Set as default button before exiting the menu. This saves you from having to repeat the process for every new project.
How to Change Background Color in the Google Docs App
If you are working on the go, the Google Docs mobile app for iPhone, iPad, and Android offers similar customization. You can access the Page Setup via the three-dot overflow menu. Note that while you can change the color, some complex formatting might be easier to manage on a Chromebook or desktop browser. The mobile interface is designed for efficiency, so the steps are slightly different from the desktop version.
First, open your document in the mobile app and tap the Edit icon (the pencil symbol) in the bottom right corner. Once you are in editing mode, tap the three vertical dots in the top right corner of the screen to open the options menu. From there, select Page setup. You will see an option for Page color. Tap it to reveal a selection of color swatches.
After choosing your color, tap the back arrow to return to the document. You will notice the change immediately. It is important to remember that if your mobile device is set to “Dark Mode,” the background color might appear differently than it will when printed or viewed in “Light Mode.” To see the true color of your document on a mobile device, you may need to tap the three-dot menu and toggle the View in light theme option. This ensures that the aesthetic choices you make are exactly what others will see when they view the file.
Customizing Background Color for Tables and Cells
When you need to highlight specific data, changing the background color of a table or individual cells is essential. You can do this by right-clicking inside a cell and selecting “Table properties.” From there, you can adjust the cell background color to create rows that stand out. This is a vital skill for students creating organized study guides or professionals building project trackers.
To change the background of an entire table or specific rows, first, highlight the cells you wish to modify. Right-click the highlighted area and choose Table properties from the context menu. On the right side of the screen, a sidebar will appear with several expandable sections. Look for the Color section. Here, you will find an option for Cell background color.
Selecting a color from this menu will apply it only to the cells you have highlighted. This technique, often called “zebra striping,” helps readers follow data across long rows without losing their place. Unlike the page background color, which affects the entire document canvas, cell background colors are contained strictly within the table borders. This allows for a high level of visual organization within a single page.
How to Change Background Color of Text and Paragraphs
Sometimes you don’t want to change the whole page, but just the area behind your words. Using the “Highlight color” tool allows you to change the background color of text. This is perfect for calling attention to specific phrases or creating a “marker” effect. To do this, select the text you want to highlight, click the Highlight color icon (the pencil icon next to the “A” text color icon) in the toolbar, and pick your shade.
For larger blocks of text, you can use the “Borders and shading” option under the Format menu to apply a background color to an entire paragraph. This creates a much cleaner look than individual word highlighting because the color extends to the margins of the paragraph. To apply this, place your cursor anywhere in the paragraph, then go to Format > Paragraph styles > Borders and shading.
In the window that appears, find the Background color dropdown. Select your color and click Apply. This method is frequently used for call-out boxes, warnings, or “Pro Tips” in instructional documents. It provides a professional, block-based look that resembles a text box without the hassle of managing floating objects on the page.
Adding and Removing Background Color from Pasted Text
A common issue is when text pasted from the web brings along unwanted formatting. You can remove background color from pasted text by selecting the text and clicking Format > Clear formatting. This is the fastest way to fix “can’t change background color” issues caused by external CSS styles. Often, when you copy a snippet from a website, the “grey box” or white background follows the text, clashing with your document’s background.
To prevent this from happening in the first place, use the keyboard shortcut Ctrl + Shift + V (Windows) or Cmd + Shift + V (Mac) when pasting. This “Paste without formatting” command strips away all background colors, fonts, and link styles, leaving only the raw text.
If you have already pasted the text and see a weird background color, you can also use the Highlight color tool and select None. If that fails, it usually means the background color is actually a paragraph shading or a single-cell table. In those cases, you would go back to the “Borders and shading” or “Table properties” menus mentioned earlier to reset the background to transparent or “None.”
How to Change Background Color for Specific Pages
Google Docs traditionally applies background colors to the whole document. However, by using “Sections,” you can effectively change the color of one page or a specific section. This is a relatively new feature that provides much-needed flexibility for users who want to create distinct chapters or cover pages within a single file.
To change the background of just one page, you first need to isolate it using section breaks. Place your cursor at the very end of the page preceding the one you want to change. Go to Insert > Break > Section break (Next page). Do the same at the end of the page you are modifying to ensure the following pages aren’t affected.
Now, with your cursor on the target page, go to File > Page setup. In the “Apply to” dropdown menu, make sure to select This section instead of “Whole document.” You can then change the Page color as usual. This will apply the color only to that specific section. This is incredibly useful for creating high-impact title pages or separating a document into clearly defined visual segments.
Customizing with Images and Watermarks
While Google Docs does not have a “Set image as background” button in the same way it handles solid colors, you can achieve this effect using the Watermark feature. This is the official workaround for users who want a textured background, a company logo, or a full-page photograph behind their text.
To do this, go to Insert > Watermark. A sidebar will open on the right. You can click Select image to upload a file from your computer or Google Drive. Once the image is inserted, you can adjust the scale and check the Faded box to ensure the image doesn’t make the text unreadable.
If you want the image to act as a full-page background, you can uncheck “Faded” and manually adjust the transparency using the Image options available within the watermark tool. This provides a level of aesthetic customization that goes far beyond simple solid colors, allowing content creators to design beautiful flyers or branded reports directly within Google Docs.
FAQs – Google Docs How to Change Background Color
To change a single page’s color, you must use section breaks. Insert a “Section break (next page)” before and after the page. Then, go to File > Page setup, change the “Apply to” setting to “This section,” and choose your desired page color from the palette.
On mobile, you must be in editing mode to see Page Setup. Tap the pencil icon at the bottom of the screen first. Then, tap the three dots in the top right corner. If the document is in “Print layout” view, the Page setup option will appear in that menu.
The easiest way is to select the affected text and press Ctrl + \ (Windows) or Cmd + \ (Mac) to clear formatting. Alternatively, go to the Highlight color tool in the top toolbar and select “None” to strip the background color from the selected words.
Yes, you can. Navigate to File > Page setup and click the Page color icon. Under the “Custom” section, click the plus (+) icon. A box will appear where you can enter a specific six-digit HEX code to match your exact branding or design requirements.
Google Docs does not have a direct background image button, but you can use the Watermark feature. Go to Insert > Watermark, upload your image, and adjust the scale and transparency. This allows the image to sit behind your text across every page of the document.


